Tip: Start typing in the input box for immediate search results.
-
Getting Started
-
Client area
-
- Search for a domain
- Domain Contact Information - Client Area
- Change Domain Nameservers - Client Area
- Domain Renewal - Client Area
- Domain Redirect - Client Area
- Domain Aliases - Client Area
- Manage Subdomains - Client Area
- Create an Addon domain - Client Area
- Domain Auto Renewal - Client Area
- Transfer a Domain to Extilum as Unregistered User
- Transfer a Domain to Extilum as Registered User — Client Area
- Manage a Domain - Client Area
- Domain Registrar Lock - Client Area
- Get Domain EPP Code - Client Area
- Transfer a Domain from Extilum
- DNS Management - Client Area
- Show all articles ( 1 ) Collapse Articles
-
-
- Manage Privileges for MySQL Database – Client Area
- Manage MySQL Database User - Client Area
- Manage MySQL Databases - Client Area
- Manage FTP Accounts - Client Area
- Create FTP Accounts - Client Area
- Domain Redirect - Client Area
- Domain Aliases - Client Area
- Manage DNS Records with Zone editor - Client Area
- Disk Usage - Client Area
- Manage Backups - Client Area
- File Manager - Client Area
- Use IP Blocker - Client Area
- Change PHP Version - Client Area
- Manage Subdomains - Client Area
- Unban IP Address - Client Area
- Create an Addon domain - Client Area
- Show all articles ( 1 ) Collapse Articles
-
cPanel
-
- Login to cPanel
- Login to cPanel from Extilum Client Area
- The Jupiter Theme Interface - cPanel
- Switch to Paper Lantern - cPanel
- Search - cPanel
- View Server Information for cPanel
- View Statistics - cPanel
- Change Style - cPanel
- Change Language -cPanel
- Change Password - cPanel
- Update Contact Information and Preferences - cPanel
- Add User - User Manager - cPanel
- Edit User in User Manager - cPanel
- Change Password - User Manager - cPanel
- Delete User in User Manager – cPanel
- Log out of cPanel
- Show all articles ( 1 ) Collapse Articles
-
-
-
- Accessing File Manager - cPanel
- File Manager Settings - cPanel
- Create a New File or Folder in File Manager - cPanel
- Rename a file or folder in File Manager - cPanel
- Change Permissions File Manager - cPanel
- Password Protect Directory File Manager - cPanel
- Enable Leech Protection File Manager - cPanel
- Manage indices File Manager - cPanel
- Upload and download files using File Manager - cPanel
- Compress Files using File Manager - cPanel
- Extract Files using File Manager – cPanel
- Delete and Restore in File Manager - cPanel
- Search in File Manager - cPanel
- Copy Files in File Manager - cPanel
- Move Files in File Manager - cPanel
- Edit a File Using File Manager - cPanel
- HTML Editor in File Manager - cPanel
- Show all articles ( 2 ) Collapse Articles
-
- Articles coming soon
-
-
-
-
- MySQL Databases Interface - cPanel
- Add New User to MySQL Databases - cPanel
- Change a MySQL Database User's Password - cPanel
- Rename a MySQL Database User - cPanel
- Create a MySQL Database - cPanel
- Add User to MySQL Database - cPanel
- Check and Repair MySQL Database - cPanel
- Revoke User Privileges from MySQL Database - cPanel
- Delete MySQL Database - cPanel
- Delete MySQL Database User - cPanel
- Manage MySQL Databases - cPanel
-
-
- Install WordPress using Softaculous - cPanel
- Automatically Update WordPress with Softaculous - cPanel
- Backup WordPress using Softaculous - cPanel
- Manage Backup Location Softaculous - cPanel
- Manage WordPress Automated Backups Softaculous - cPanel
- Restore WordPress Backup using Softaculous - cPanel
- Clone WordPress using Softaculous - cPanel
- Stage WordPress Website with Softaculous - cPanel
- Push WordPress From Staging to Live with Softaculous - cPanel
- Remove WordPress using Softaculous - cPanel
-
-
WordPress
-
- Install WordPress using Softaculous - cPanel
- Automatically Update WordPress with Softaculous - cPanel
- Backup WordPress using Softaculous - cPanel
- Manage Backup Location Softaculous - cPanel
- Manage WordPress Automated Backups Softaculous - cPanel
- Restore WordPress Backup using Softaculous - cPanel
- Clone WordPress using Softaculous - cPanel
- Stage WordPress Website with Softaculous - cPanel
- Push WordPress From Staging to Live with Softaculous - cPanel
- Remove WordPress using Softaculous - cPanel
-
- Install WordPress Using the WordPress Toolkit - cPanel
- WordPress Toolkit Updates and Security Status Check - Cpanel
- Manage Updates using WordPress Toolkit - cPanel
- Check WordPress Integrity with the WordPress Toolkit - cPanel
- Manage maintenance mode in the WordPress Toolkit - cPanel
- Stage WordPress with the WordPress Toolkit - cPanel
- Manage Plugins using the WordPress Toolkit - cPanel
- Manage Themes using the WordPress Toolkit - cPanel
- Manage WordPress multiple sites with WordPress Toolkit
- WordPress plugins for multiple sites - WordPress Toolkit
- WordPress Themes for multiple sites – WordPress Toolkit
- Delete or Detach WordPress site – WordPress Toolkit
- Add Existing WordPress Installations to WordPress Toolkit
- WordPress Toolkit Tools - cPanel
- Back up and Restore WordPress - WordPress Toolkit
-
-
Webmail
Set Up Two-Factor Authentication for Client Area
0 out of 5 stars
| 5 Stars | 0% | |
| 4 Stars | 0% | |
| 3 Stars | 0% | |
| 2 Stars | 0% | |
| 1 Stars | 0% |
Learn How to Set Up Two-Factor Authentication for Client Area. Two-factor authentication (2FA) is a security measure that requires two forms of identification. After you enter your password, you must enter a security code. An application on your smartphone supplies this code. Without your smartphone, you cannot log in.
Table of contents
Video tutorial – Set Up Two-Factor Authentication for Client Area
Tutorial – Set Up Two-Factor Authentication for Client Area
- Install APP on Your Phone
If you don’t already have installed supported time-based one-time password (TOTP) app:
– Install on your Phone Recommended Apps– click the link next to the chosen App and follow instructions to install.
2FA requires a smartphone with a supported time-based one-time password (TOTP) app.
Recommended Apps:
For Android™, iOS®, and Blackberry® — Google Authenticator™
For Android and iOS — Duo Mobile
For Windows® Phone — Authenticator
Open the installed App on your Phone.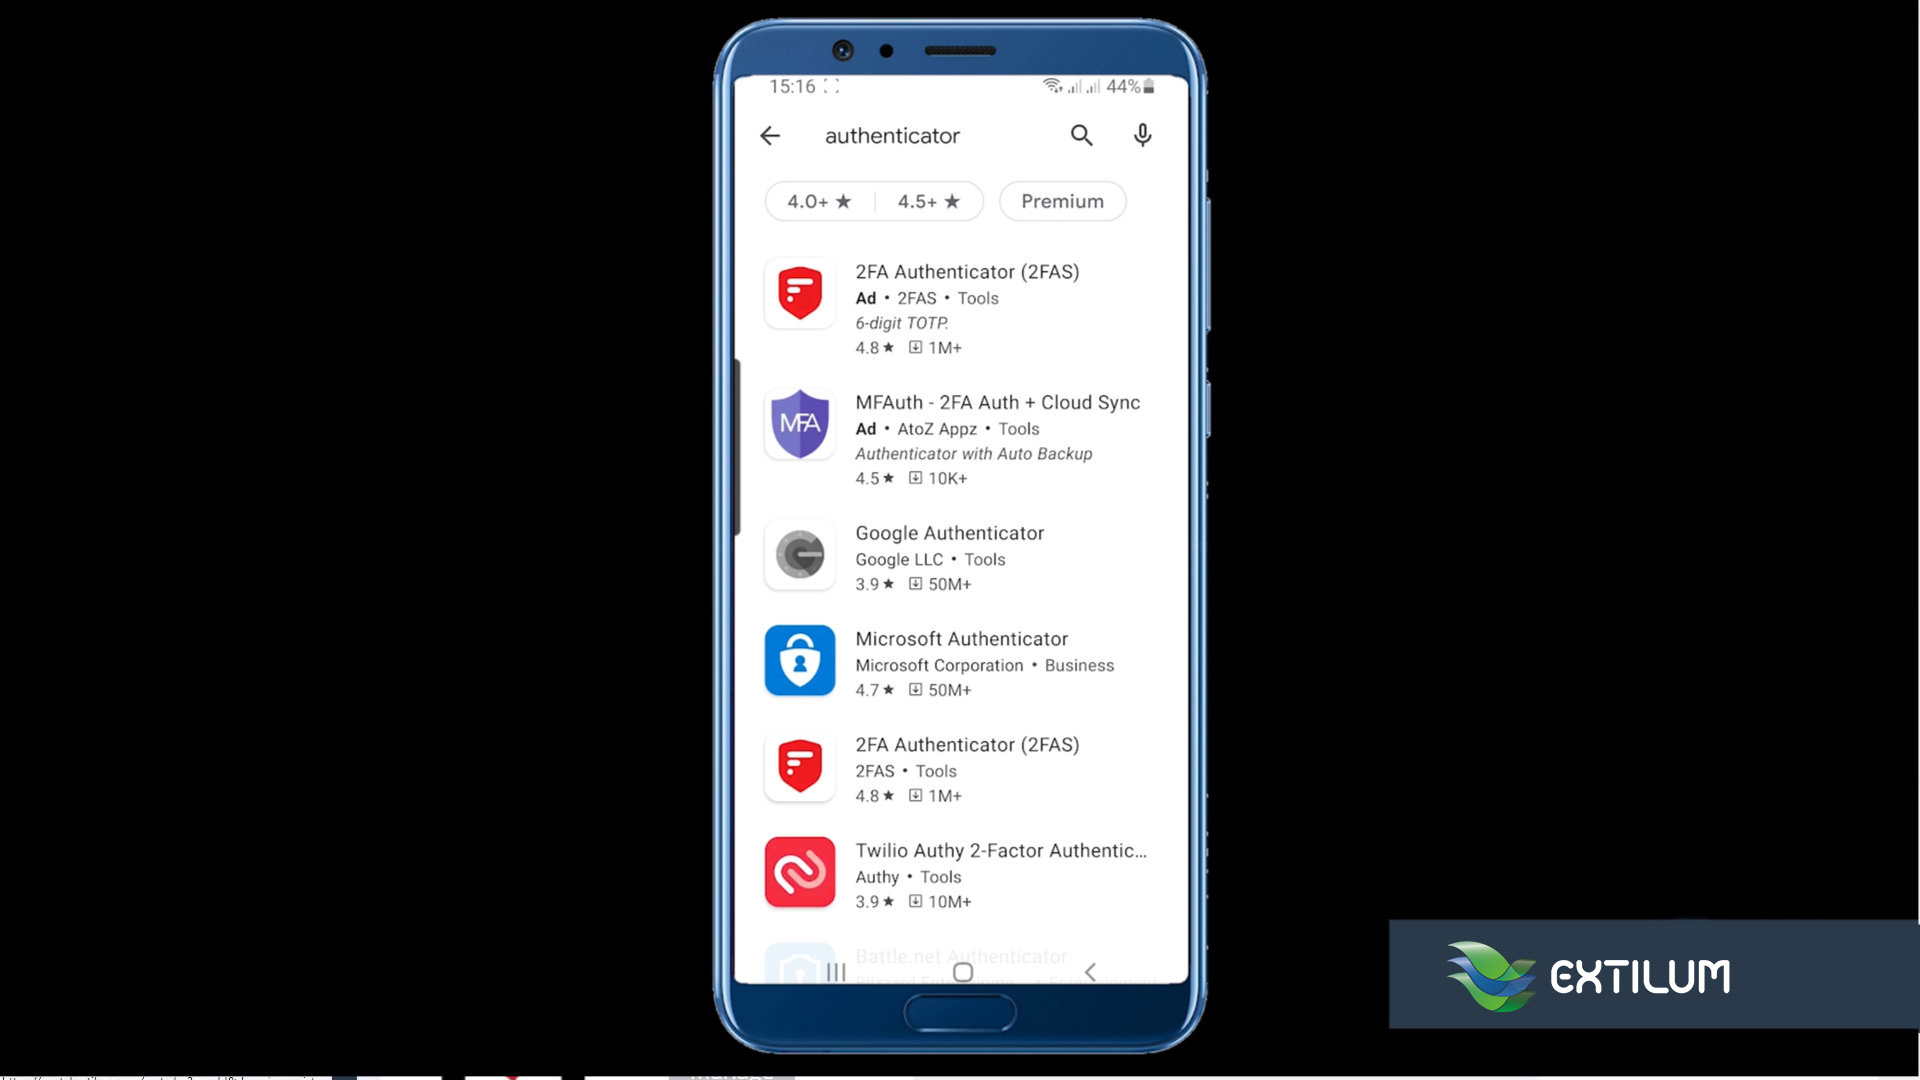
- Open The App on Your Phone
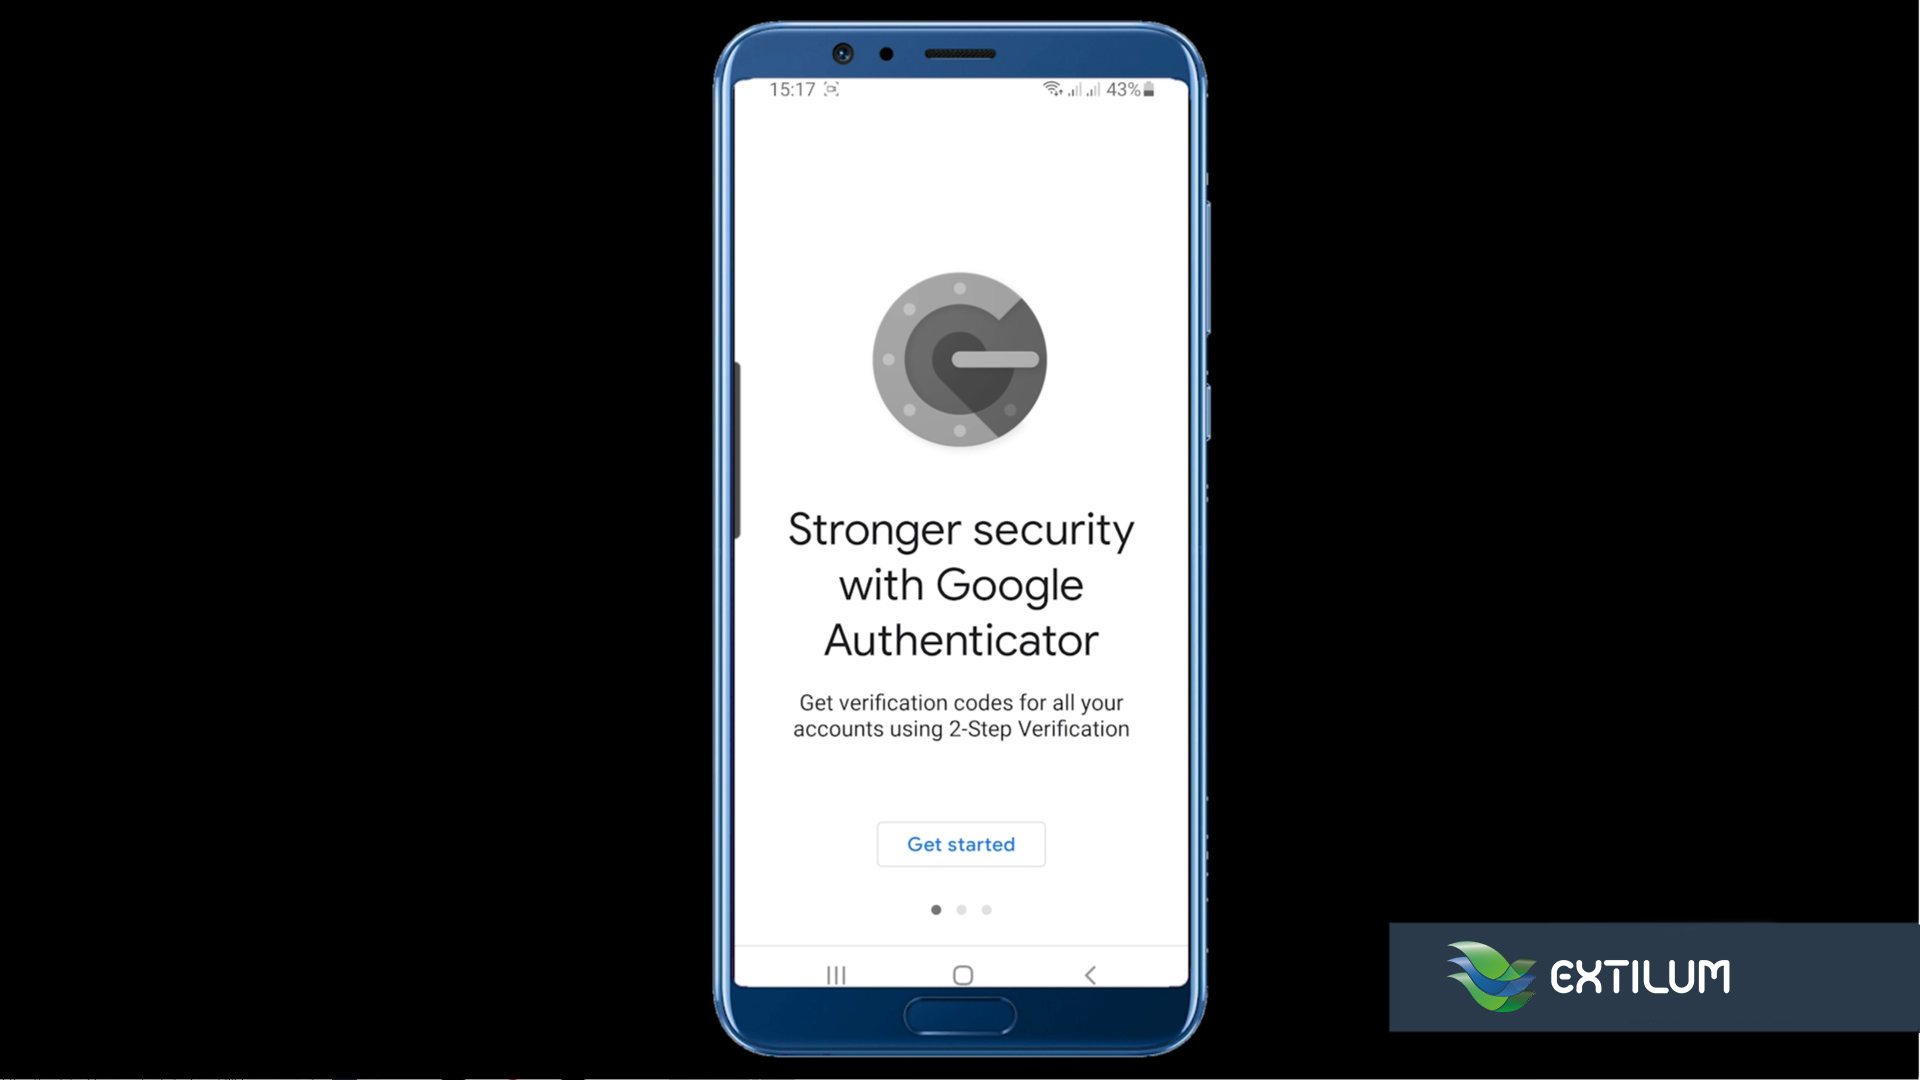
- Click the Get Started button
- Login to Extilum Client Area
You can log in to Your Client Area by going to this link.
Tutorial: Login to Client Area.
Click the Security Setting link from the drop-down menu.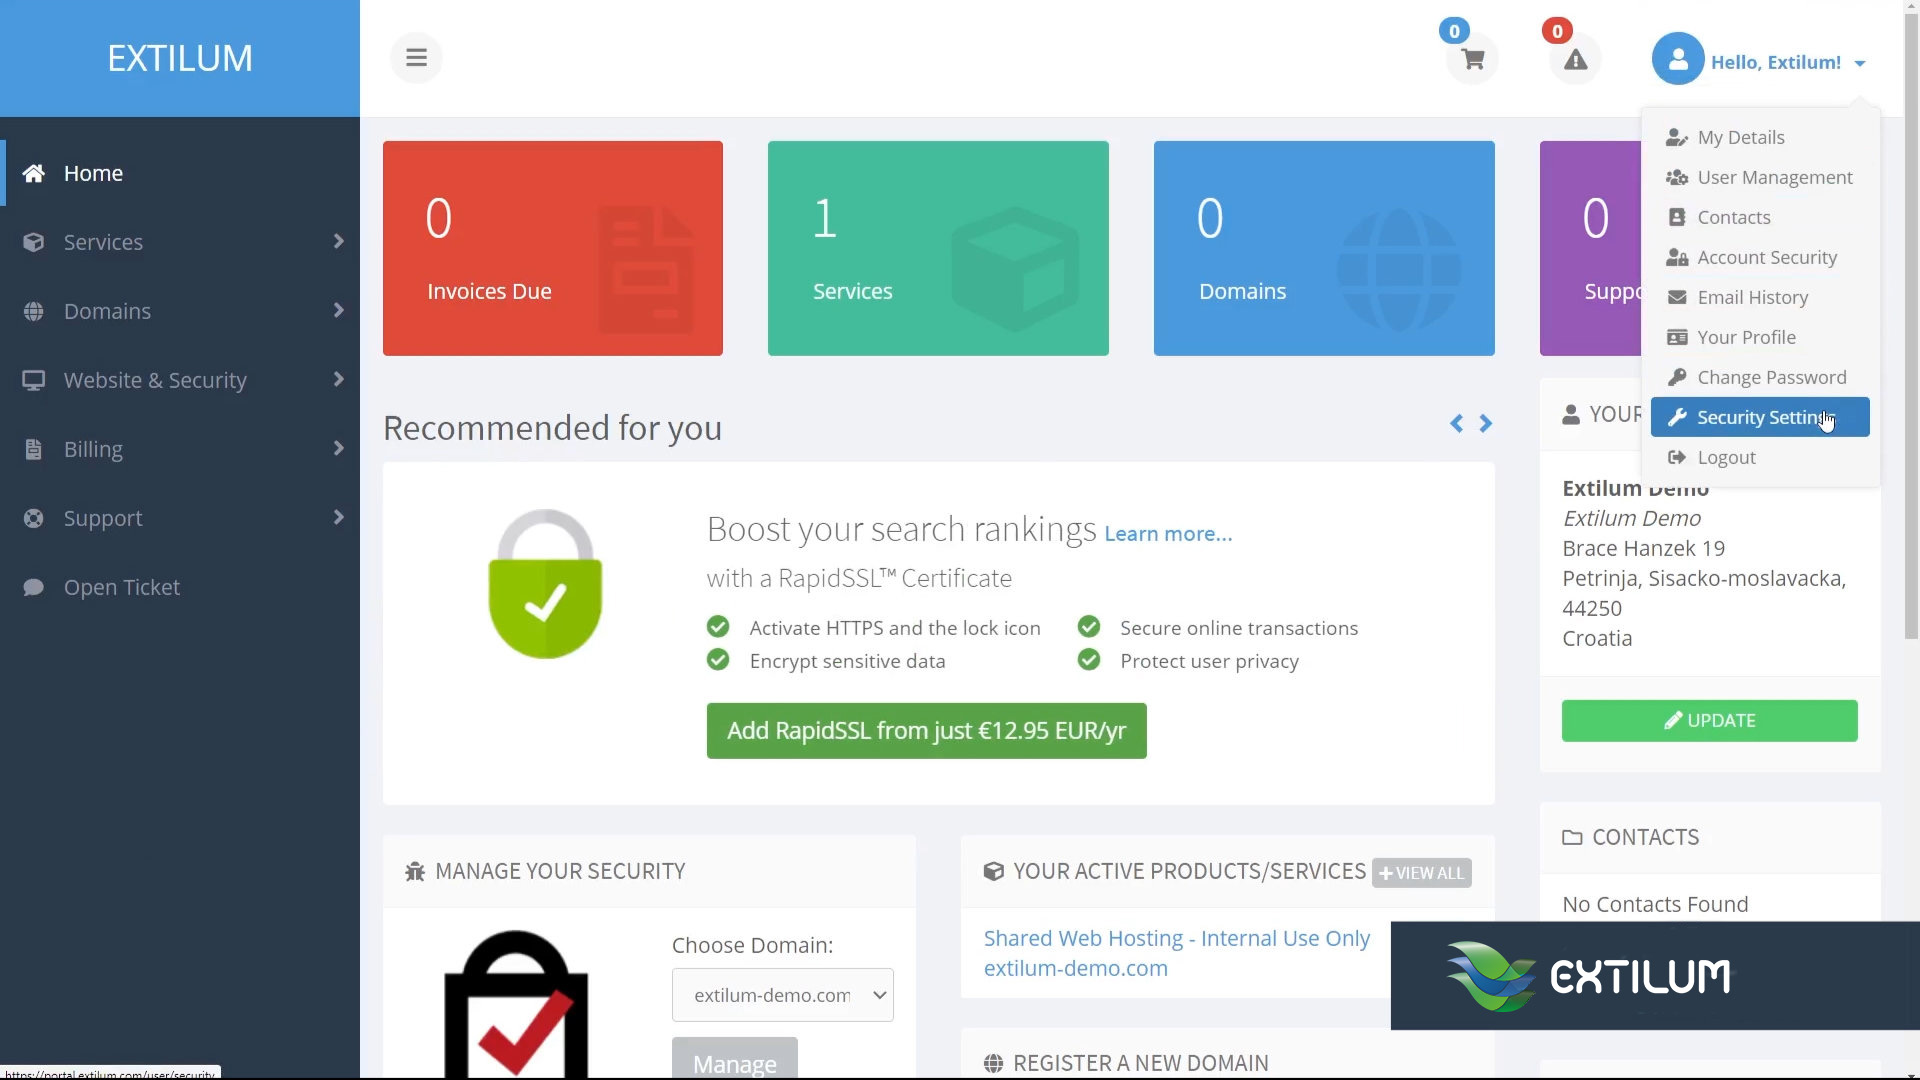
- Security Settings
Scroll down to Two-Factor Authentication Panel and click the Click Here to Enable button.
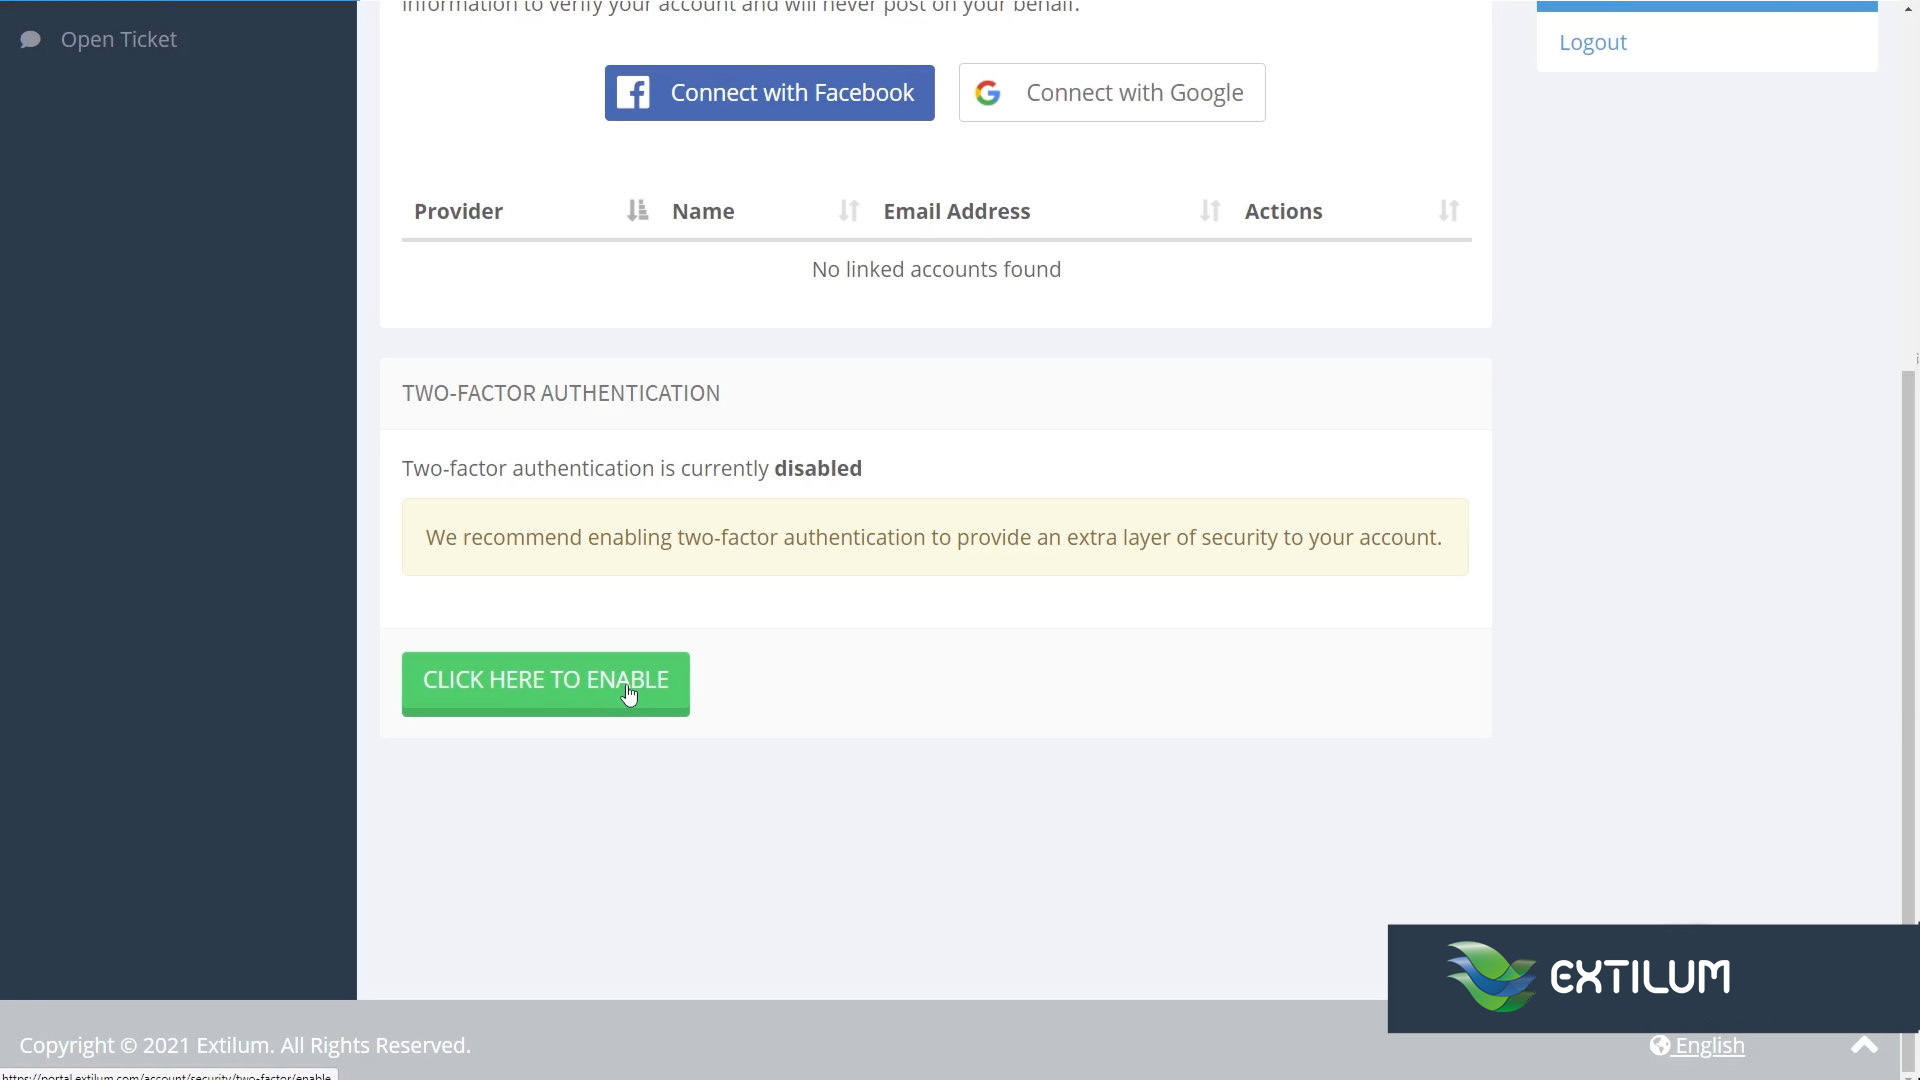
- Enable Two-Factor Authentication Window
Click the Get Started button.
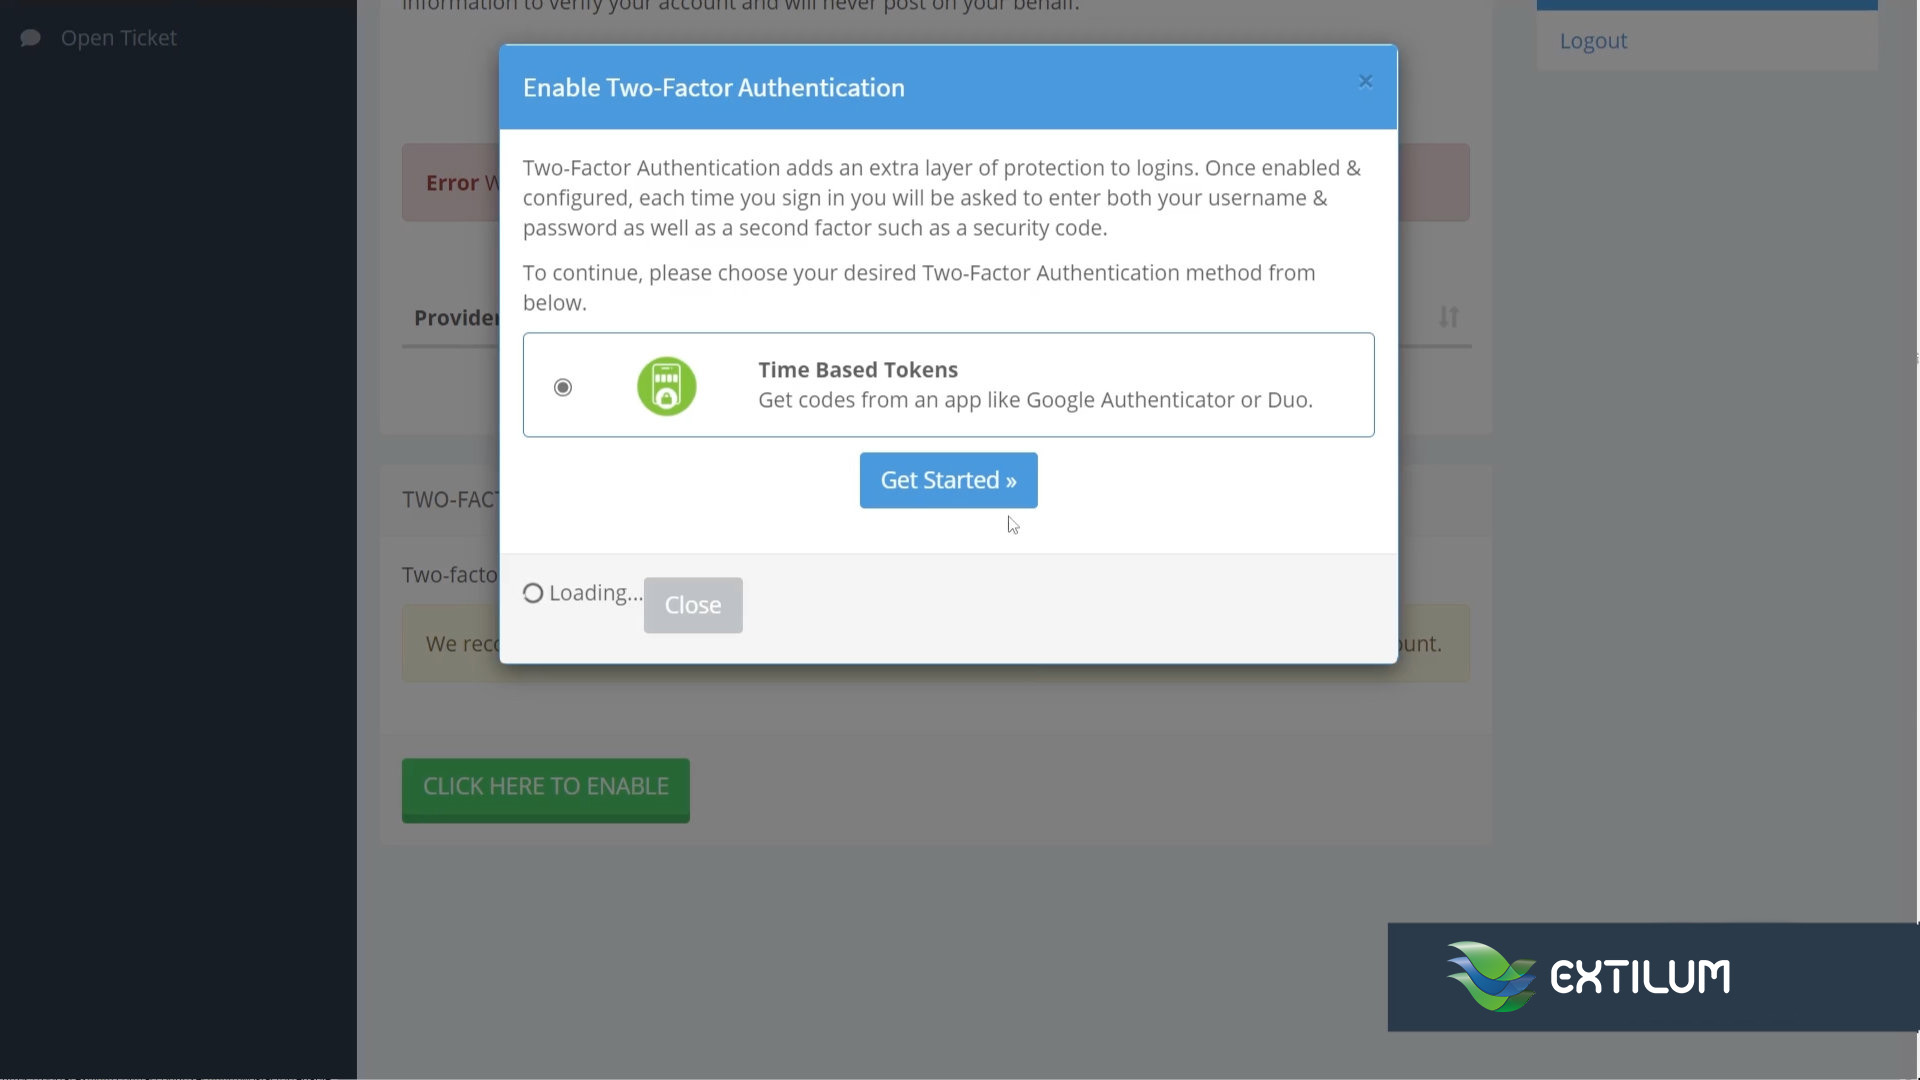
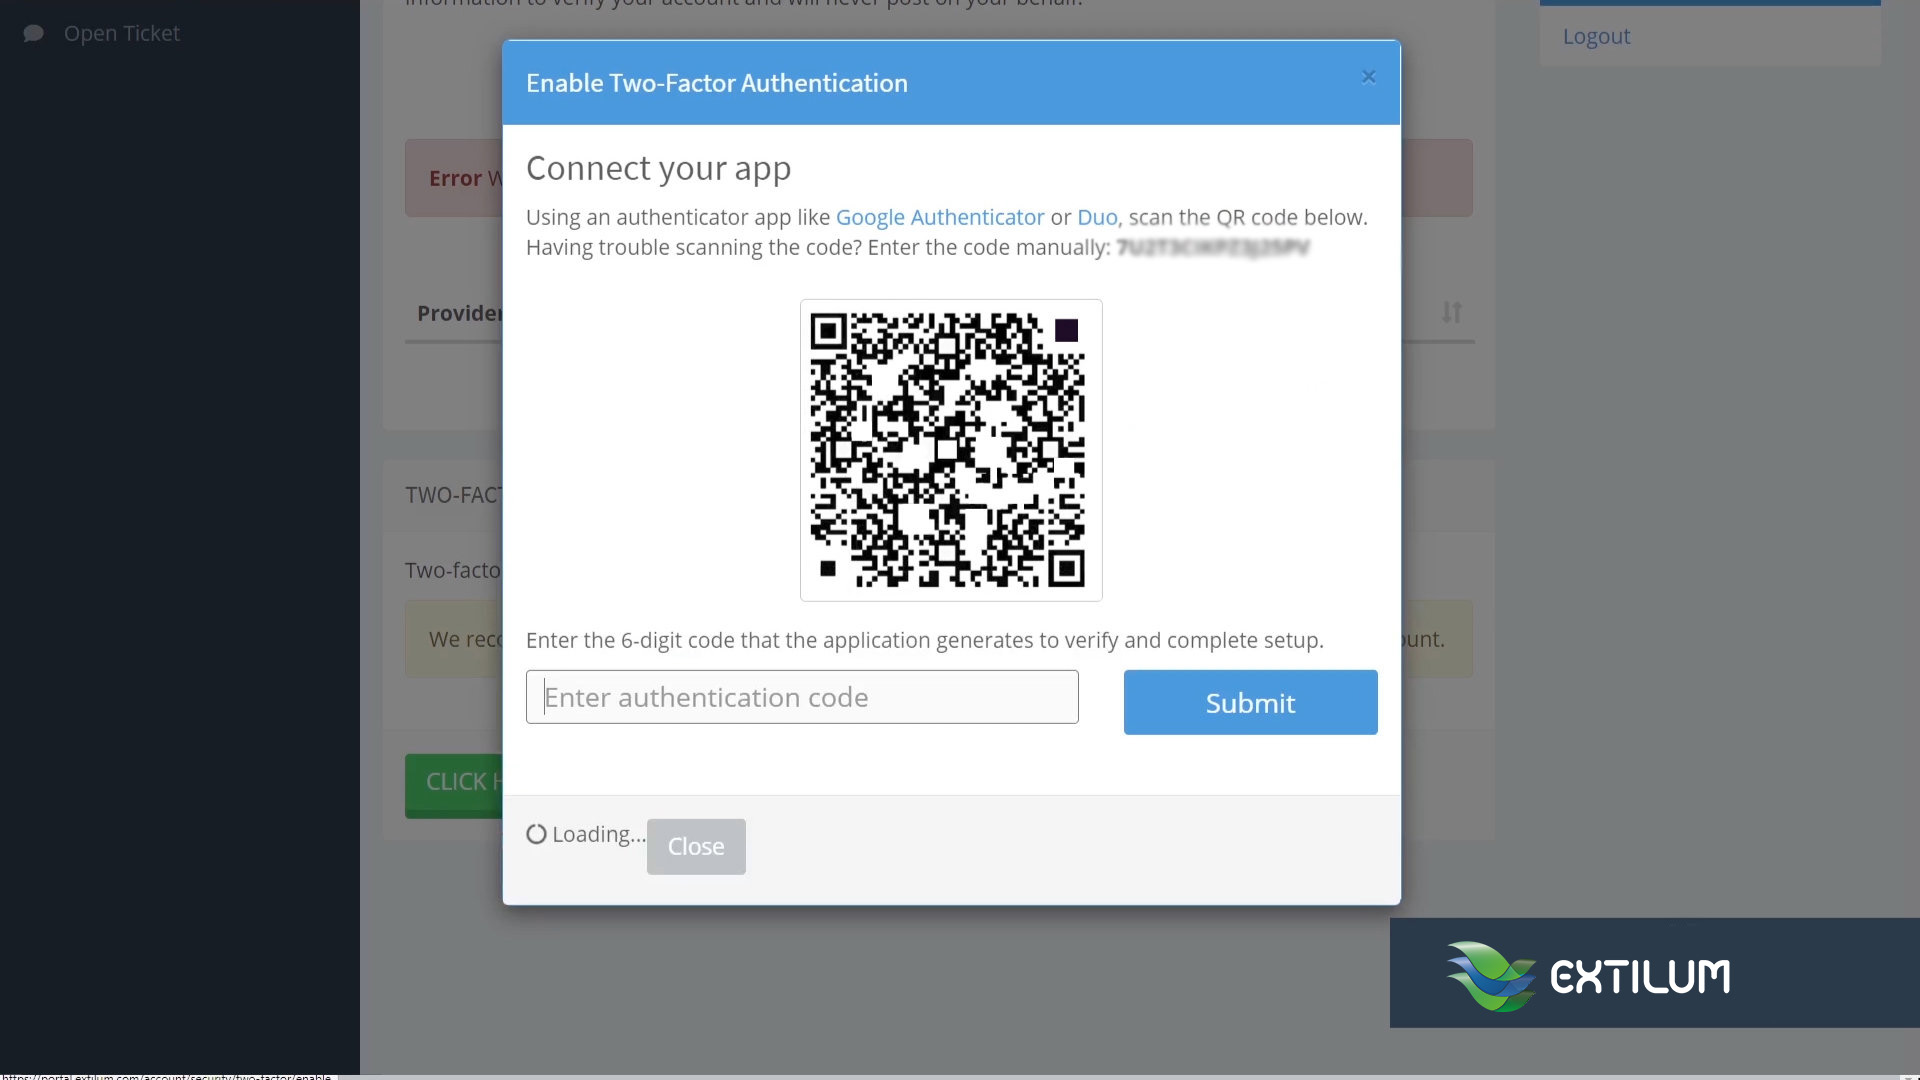
- Connect Your App
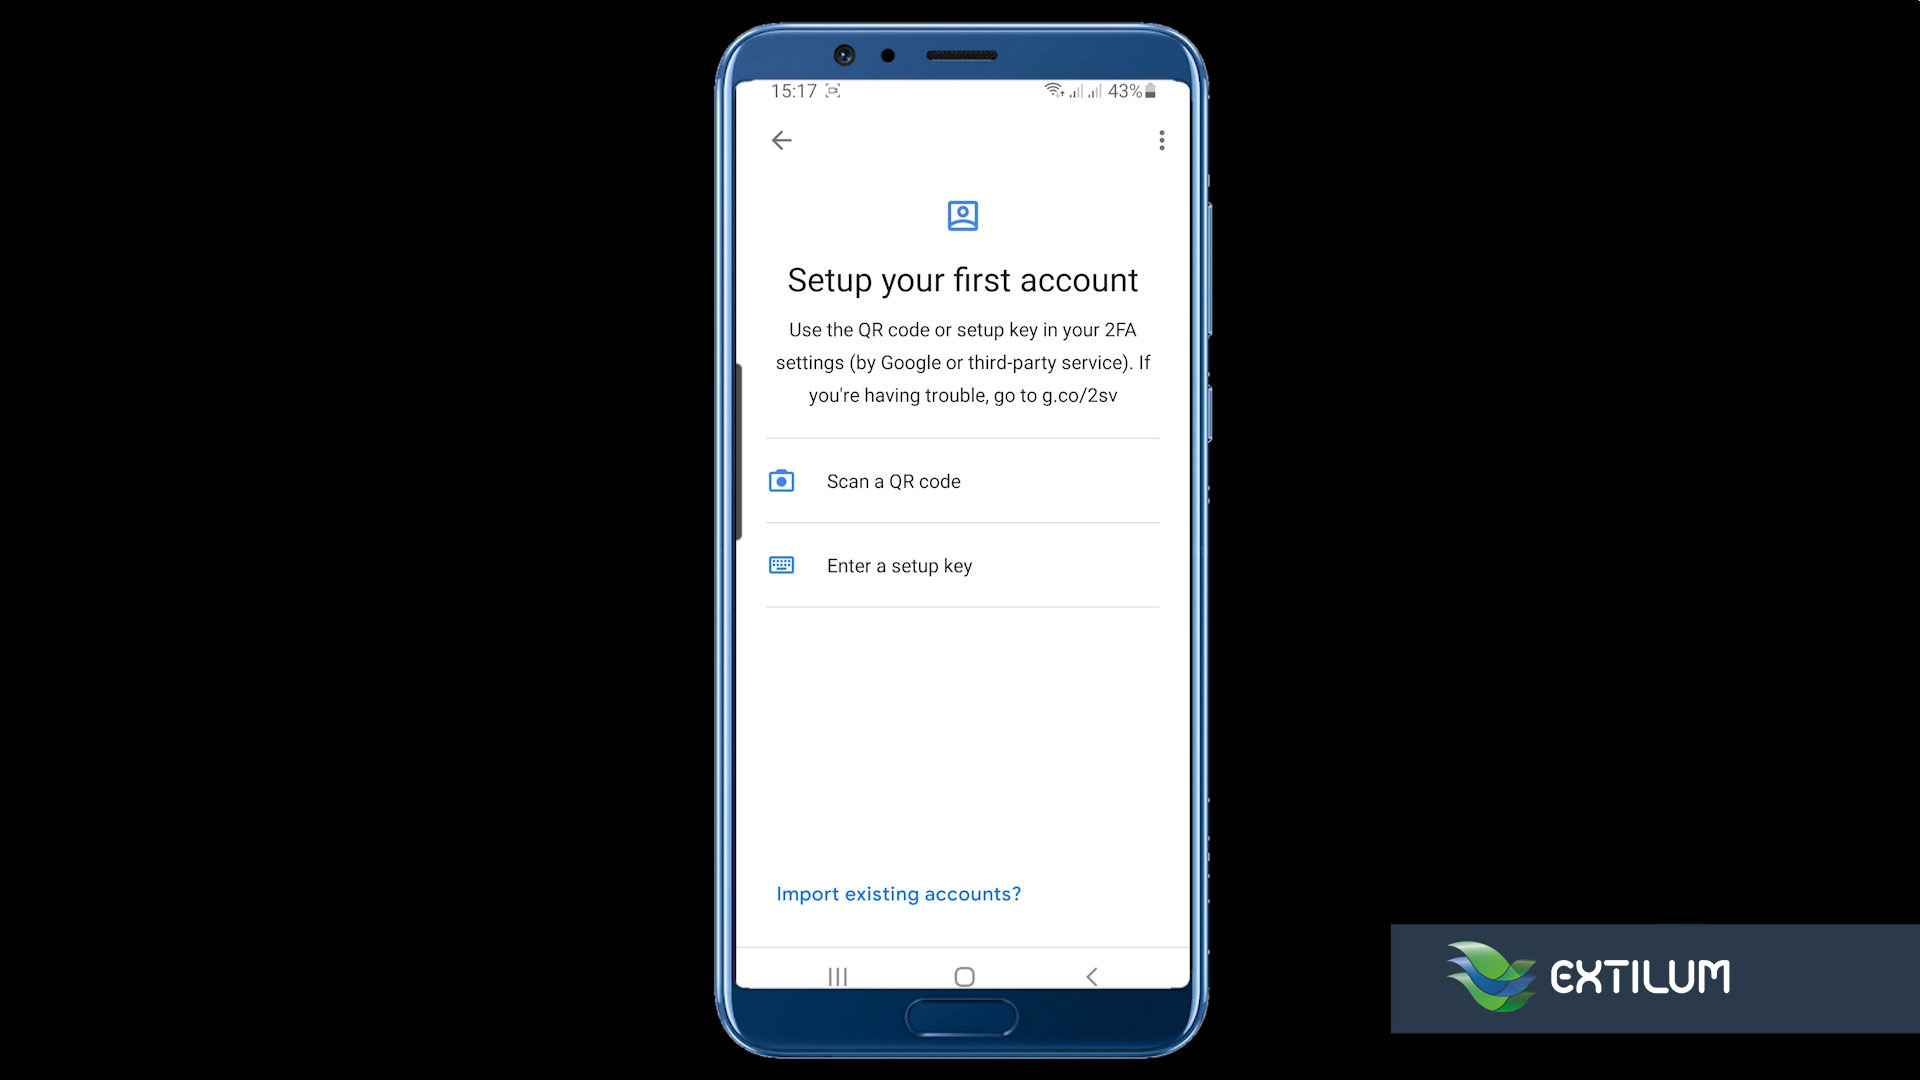
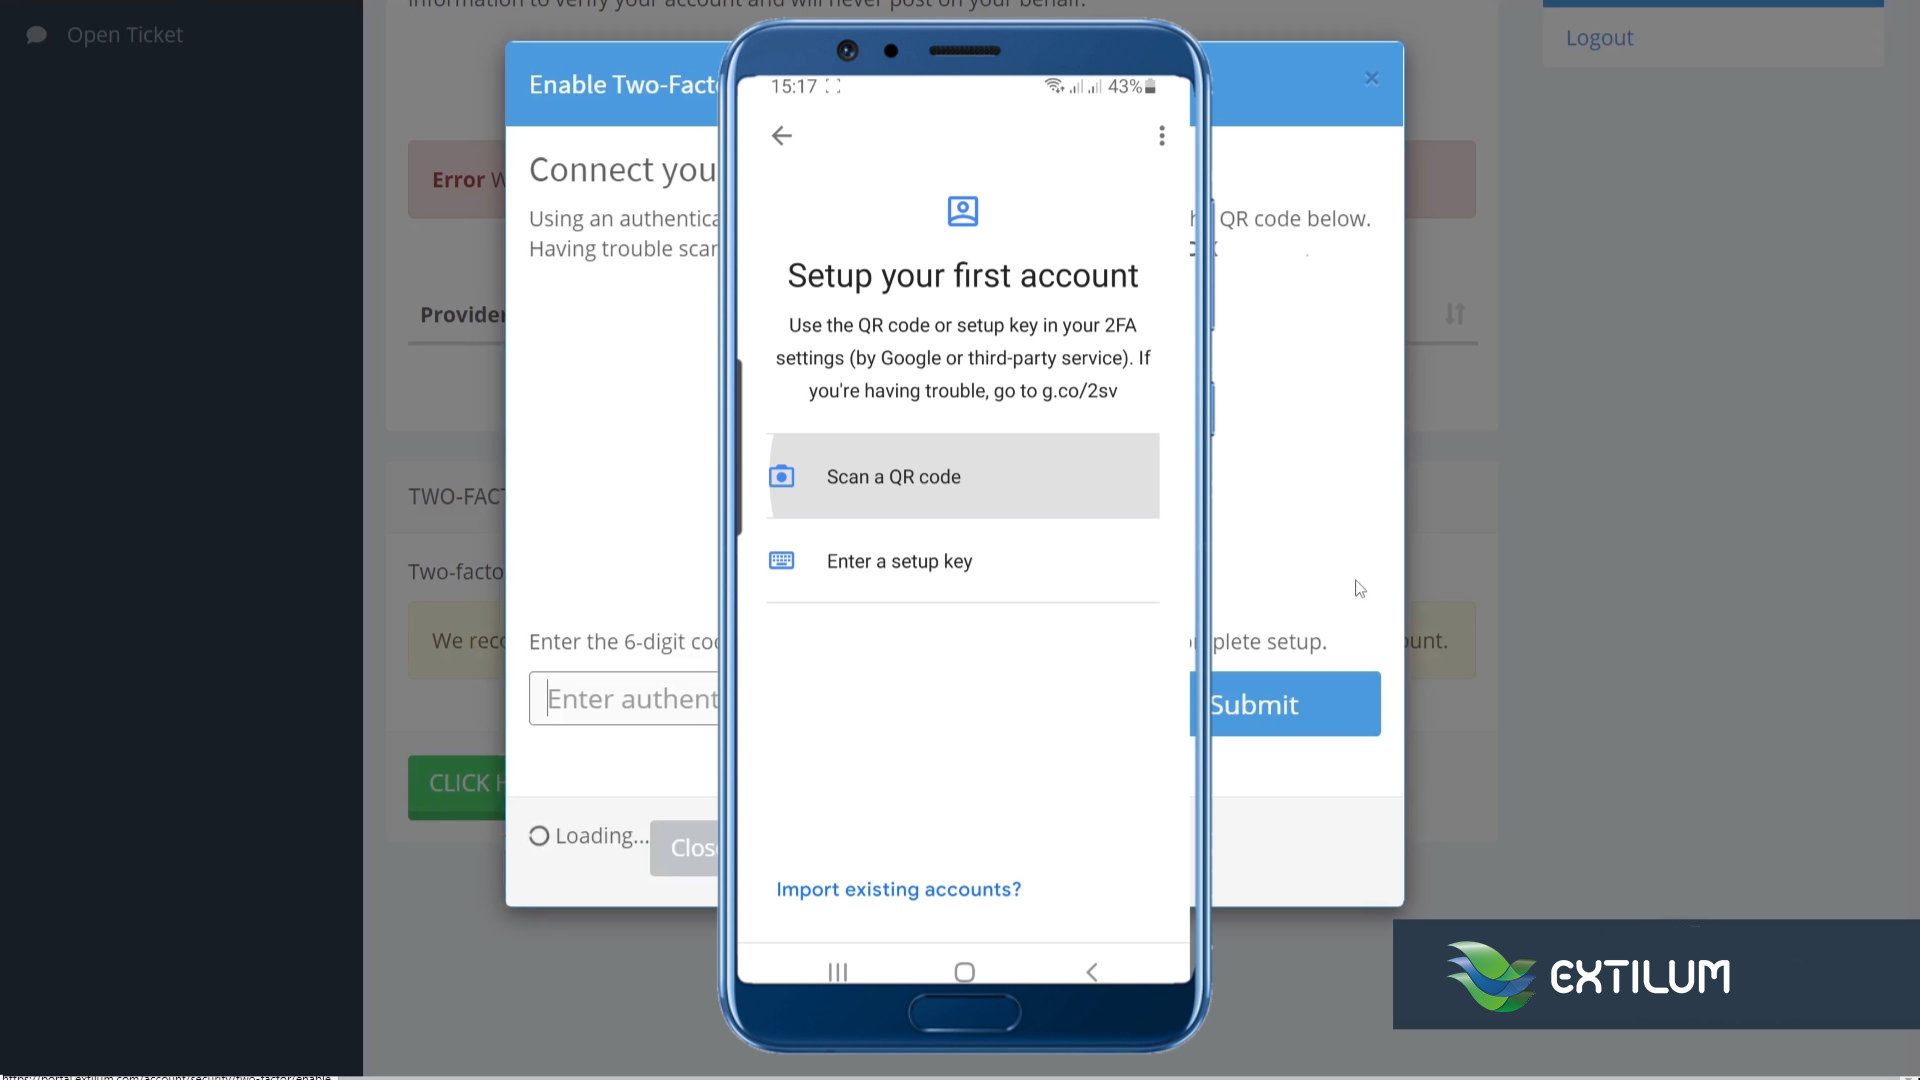
- Click the Scan a QR code button on Your Phone.
- Enable Two-Factor Authentication
Scan QR code with your Phone by placing QR code inside the red border and hold until the QR code has been processed.
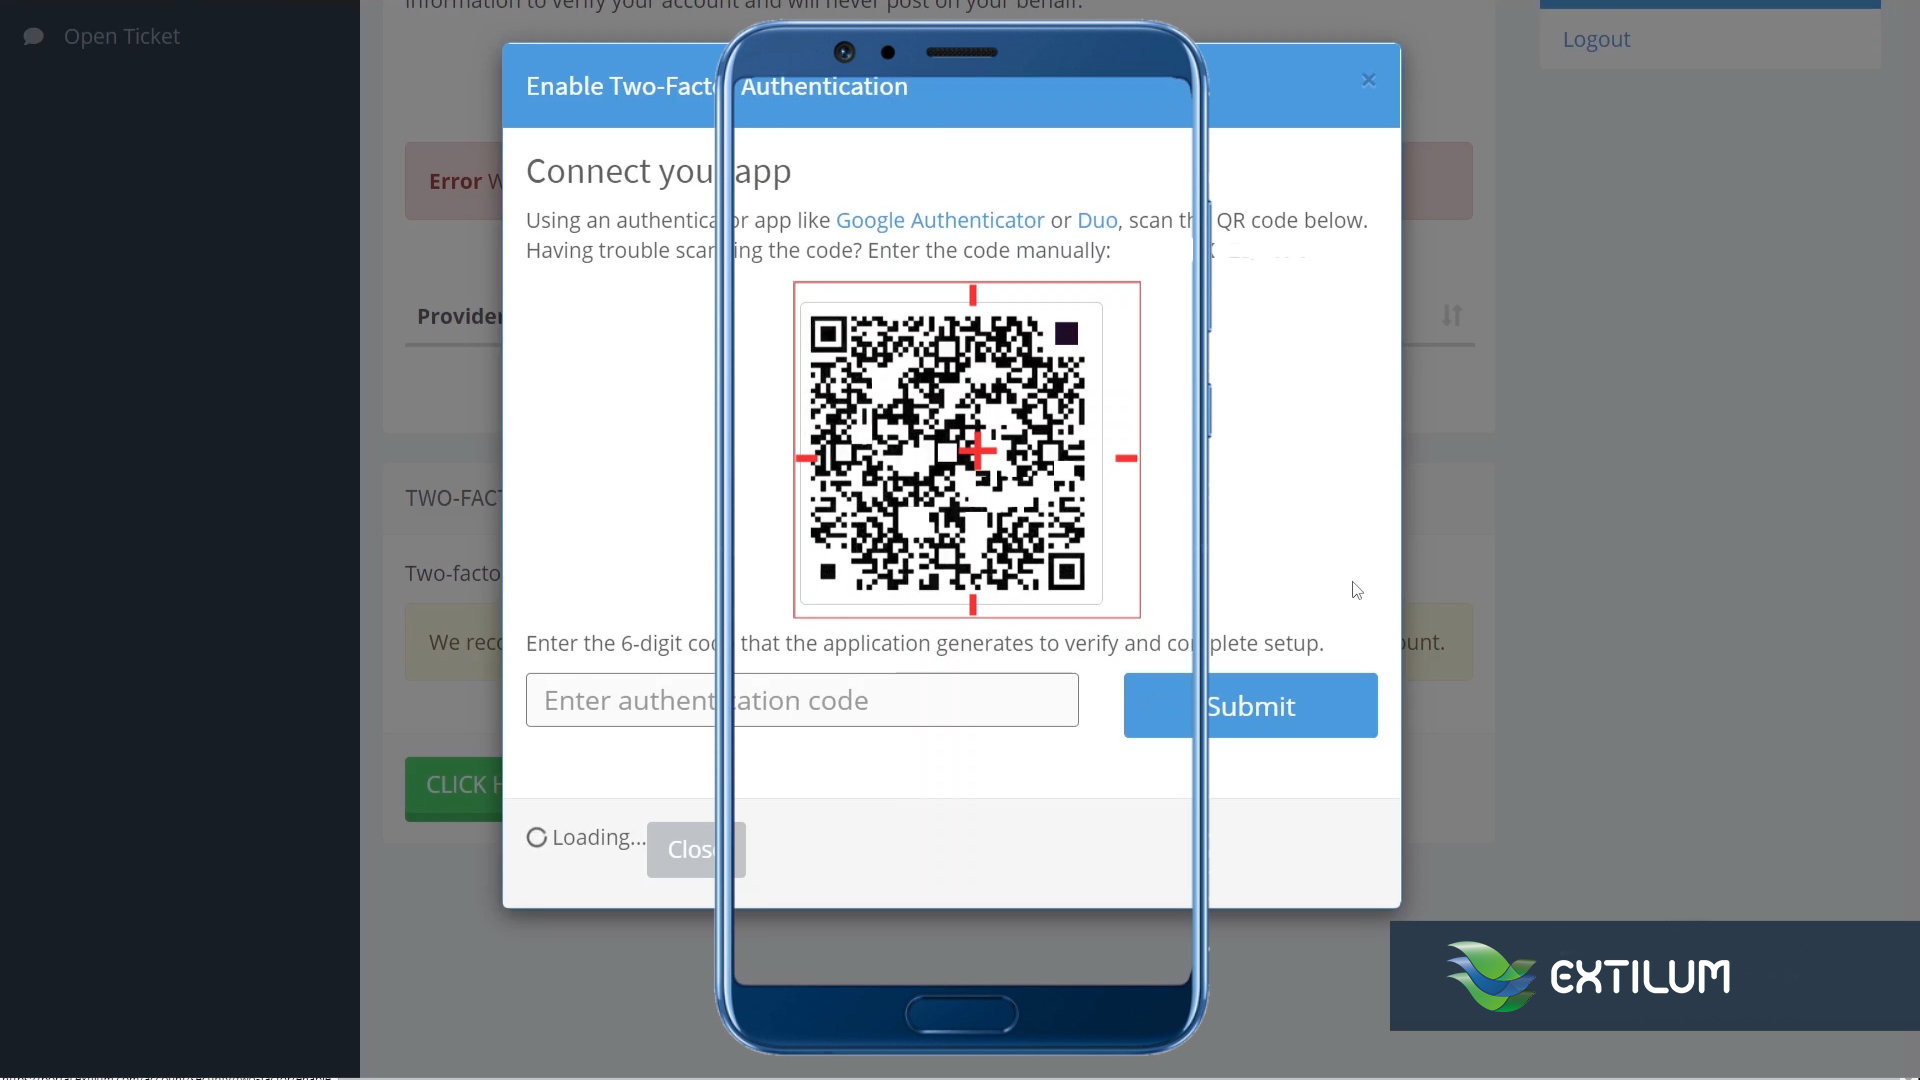
- Enable Two-Factor Authentication
Within your 2FA app, retrieve the six-digit security code.
The 2FA app generates a new six-digit security code every 30 seconds.
If you don’t have a QR code reader installed on your Phone, manually create the link.
Instead of clicking the Scan the QR code link in step 4, click the Enter a Setup key button.
Type the provided Account and code information in your app.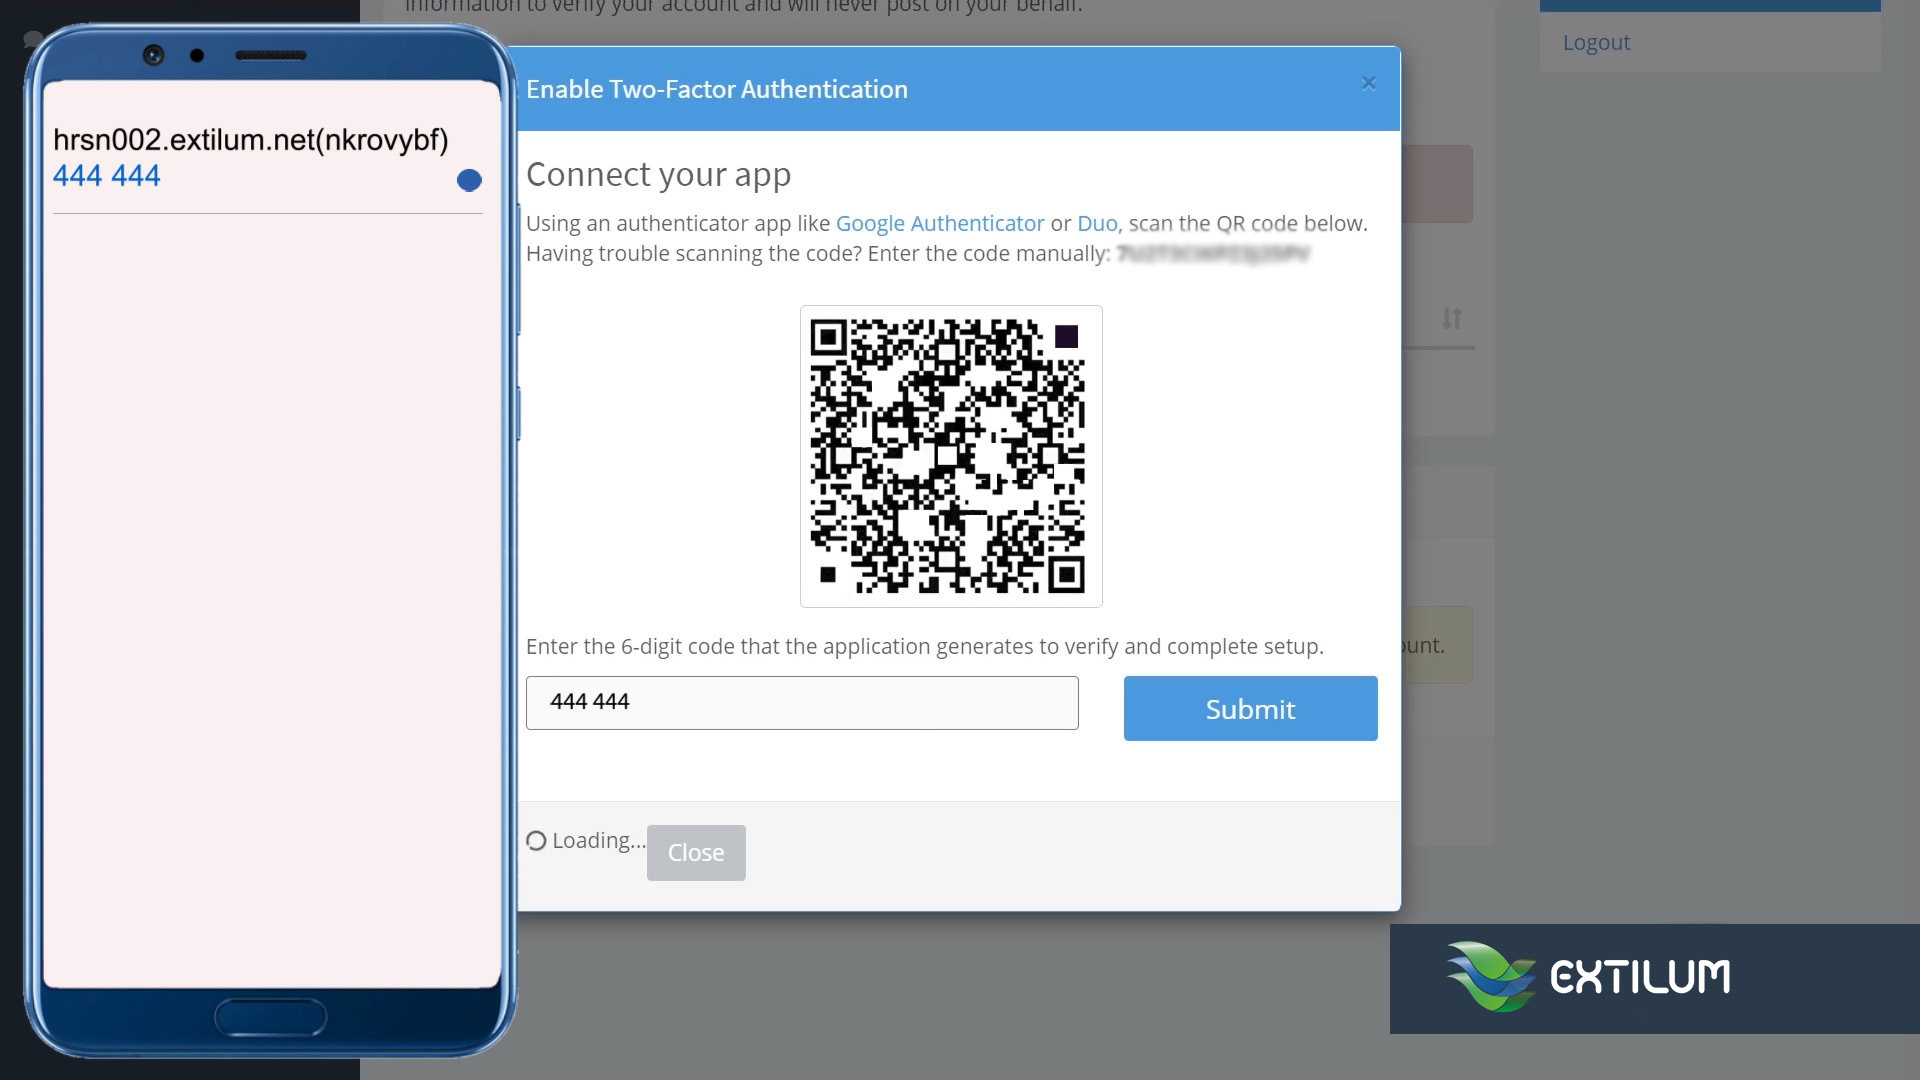
- Backup Code
Wait for the success message.
IMPORTANT:
Make a copy of the Backup code when initially enabling two-factor authentication on an account. Keep the key somewhere safe, So You can access your account if something happens to your Phone.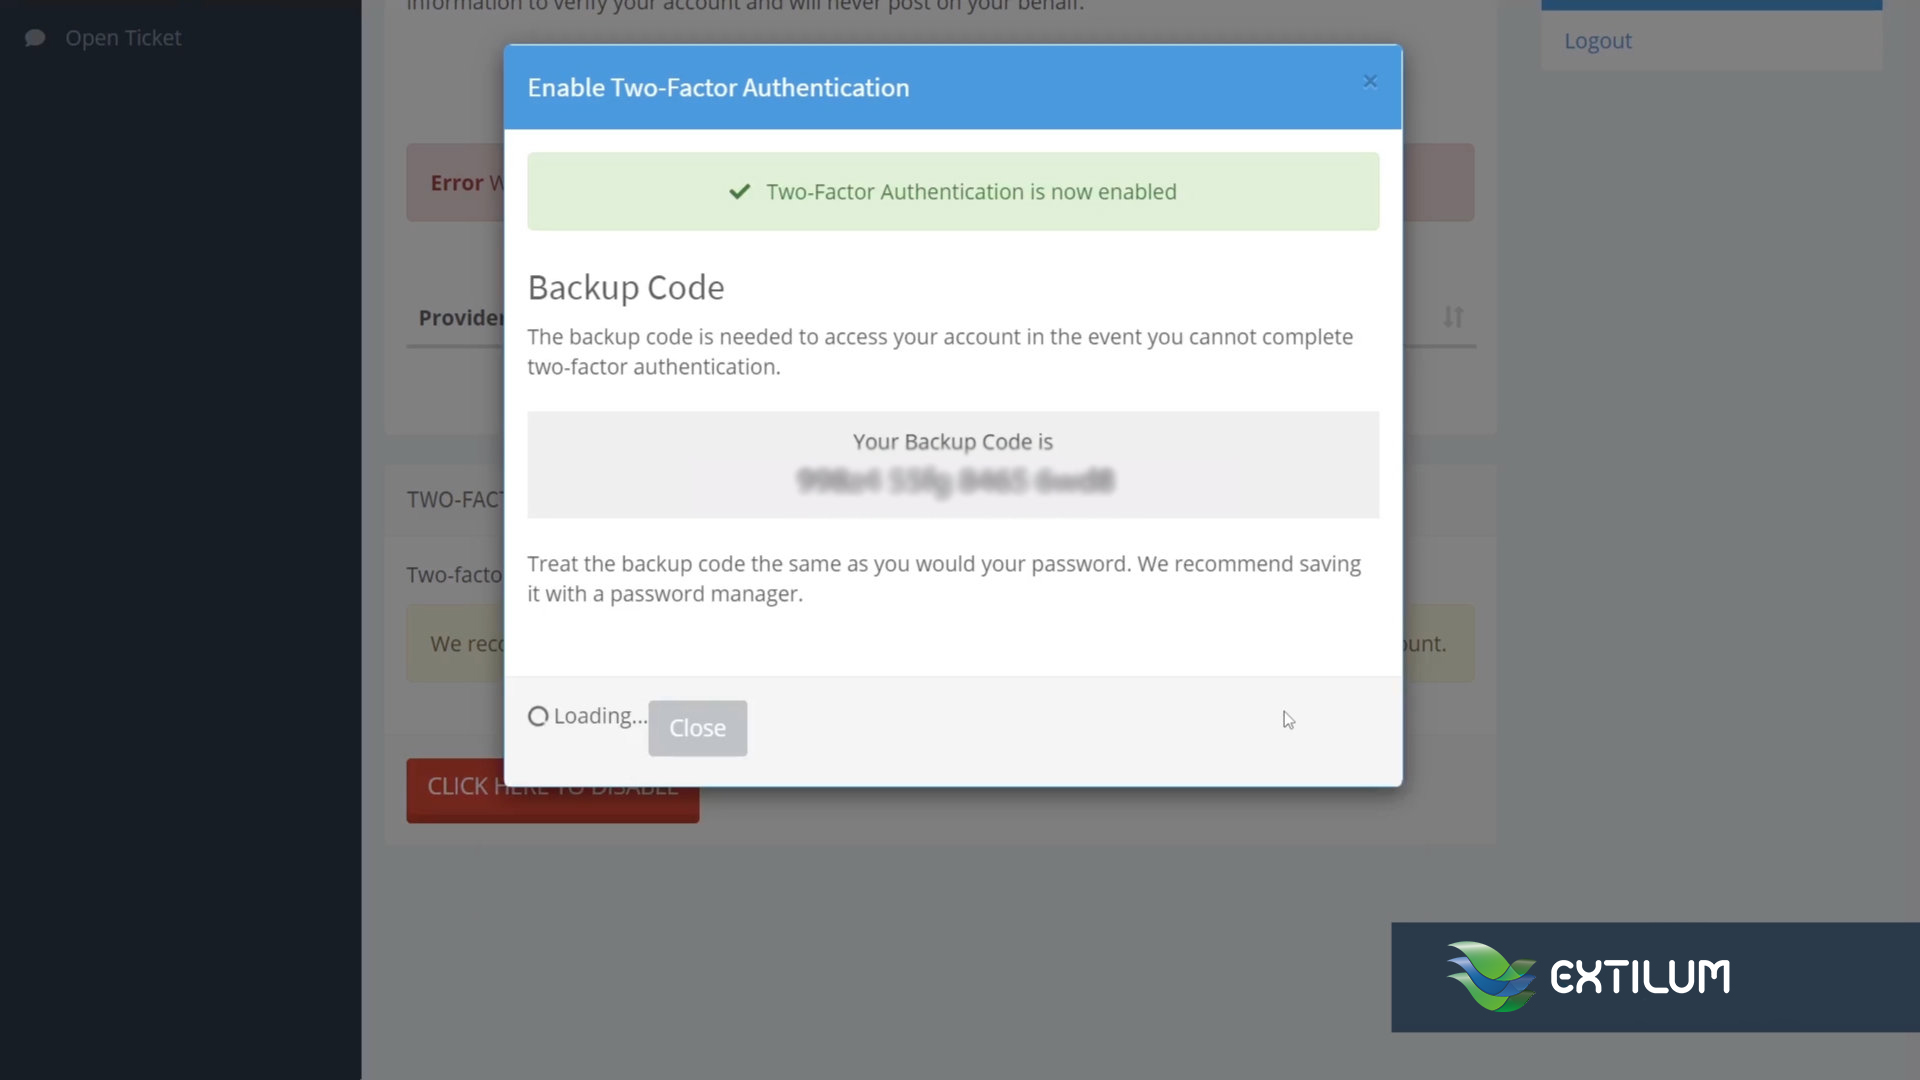
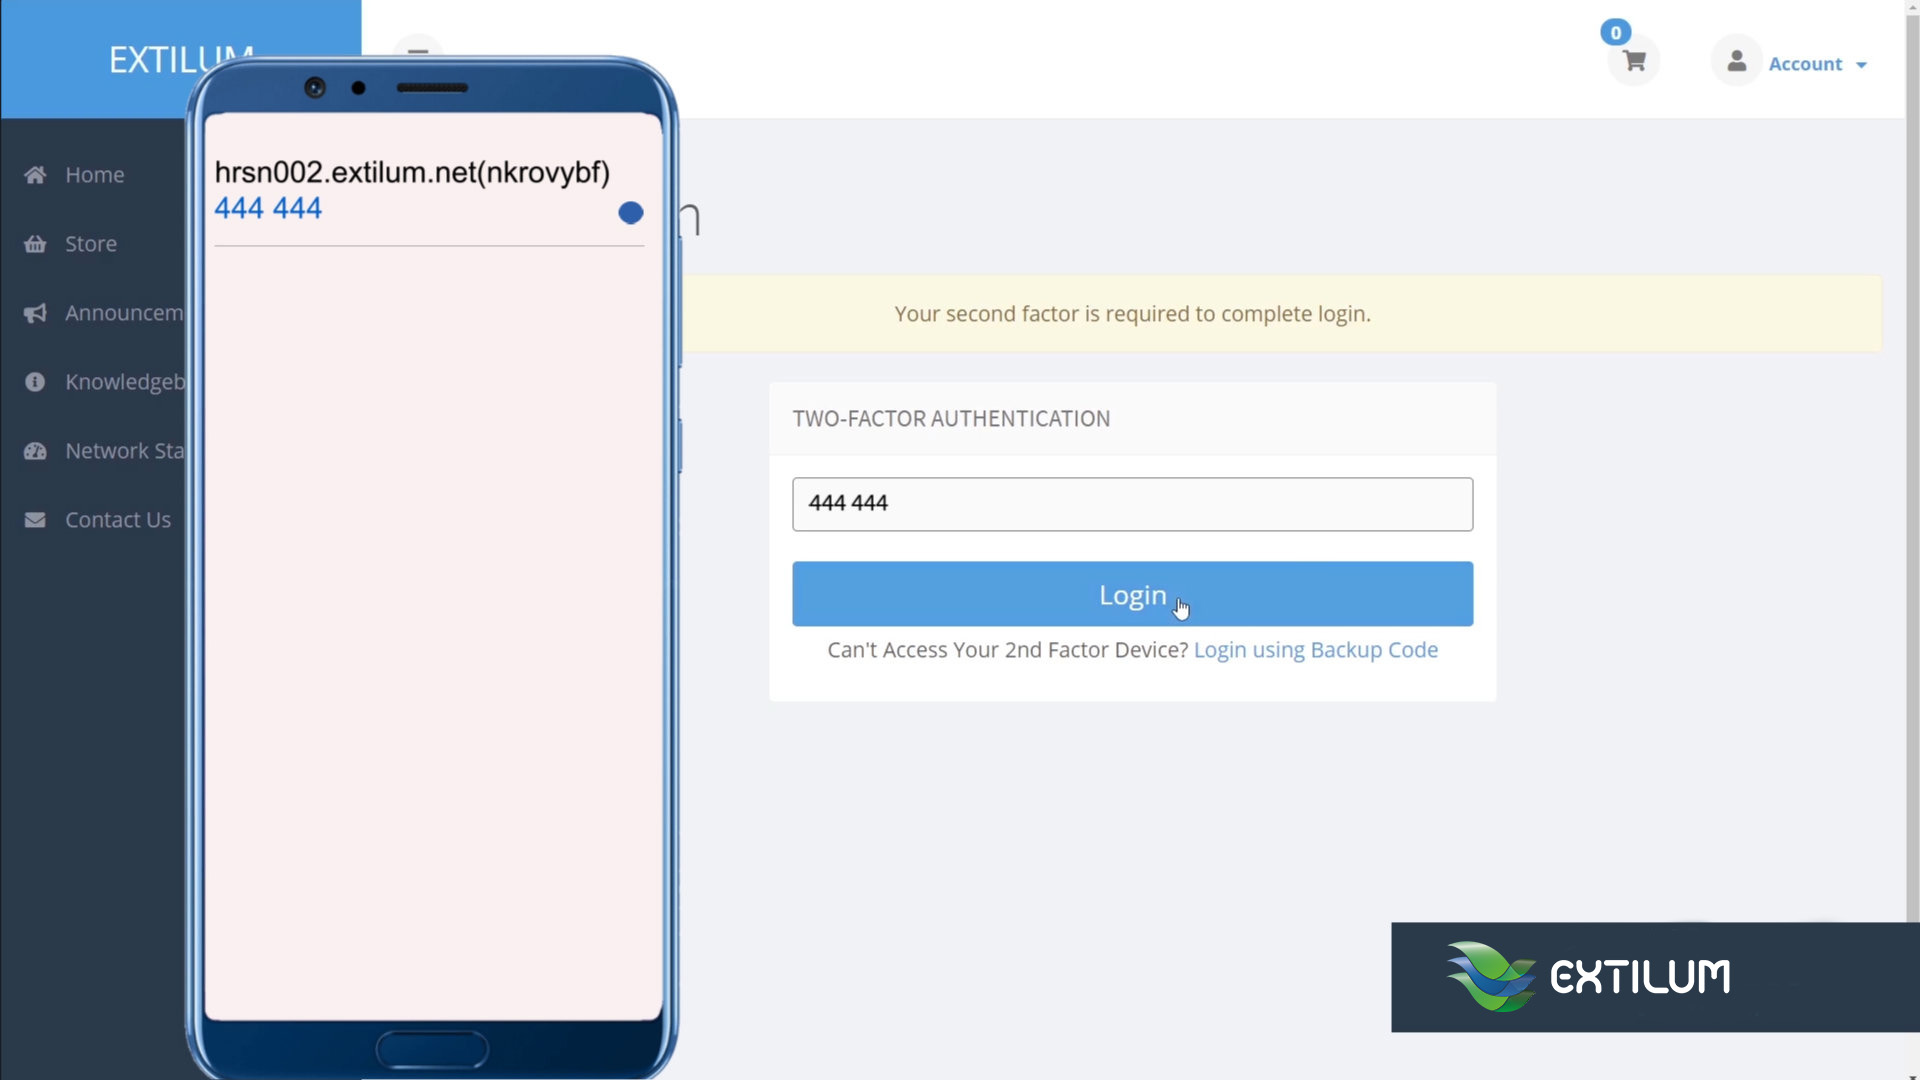
Tutorial – Login to Client Area with Two-Factor Authentication
- You can log in to Your Client Area by going to this link.
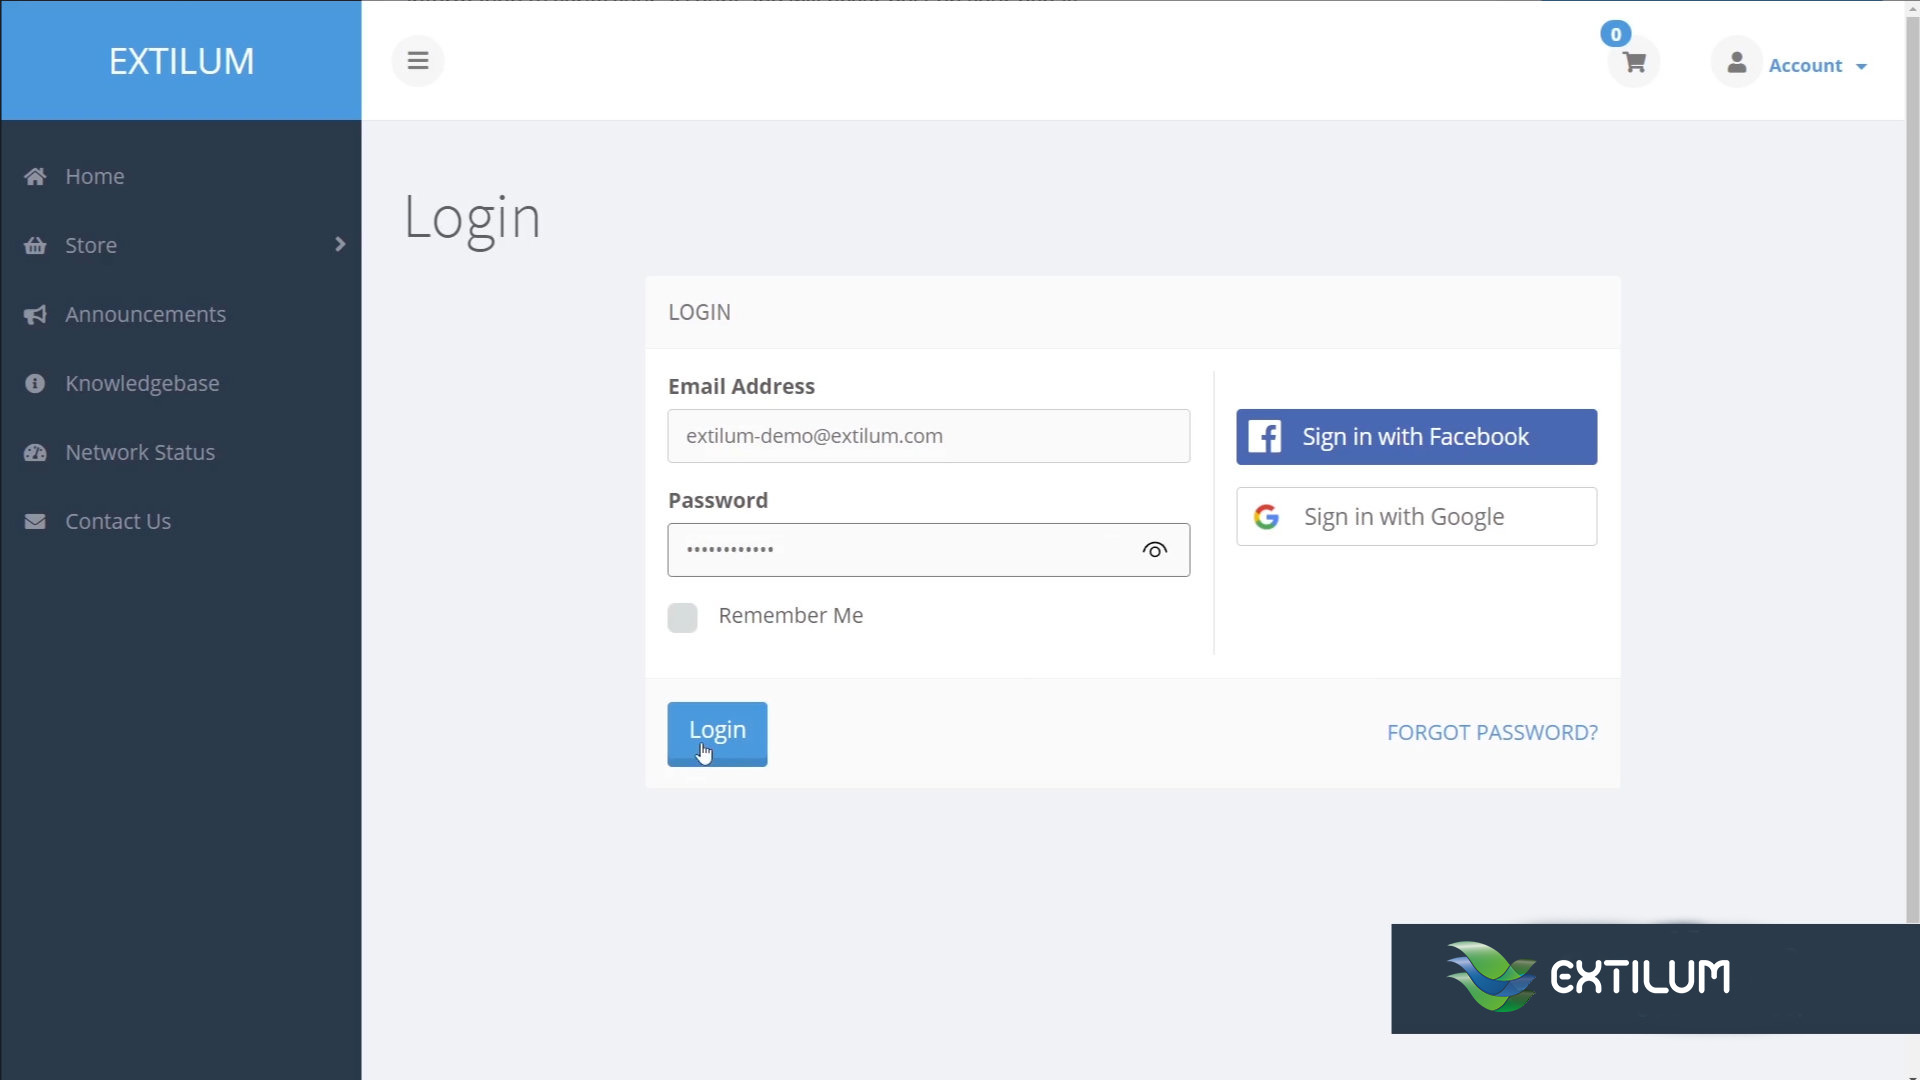
2. Enter the six-digit security code (from Your Phone) in the Two-Factor Authentication text box to log in to Client Area.
Related Articles
0 out of 5 stars
| 5 Stars | 0% | |
| 4 Stars | 0% | |
| 3 Stars | 0% | |
| 2 Stars | 0% | |
| 1 Stars | 0% |
