Tip: Start typing in the input box for immediate search results.
-
Getting Started
-
Client area
-
- Search for a domain
- Domain Contact Information - Client Area
- Change Domain Nameservers - Client Area
- Domain Renewal - Client Area
- Domain Redirect - Client Area
- Domain Aliases - Client Area
- Manage Subdomains - Client Area
- Create an Addon domain - Client Area
- Domain Auto Renewal - Client Area
- Transfer a Domain to Extilum as Unregistered User
- Transfer a Domain to Extilum as Registered User — Client Area
- Manage a Domain - Client Area
- Domain Registrar Lock - Client Area
- Get Domain EPP Code - Client Area
- Transfer a Domain from Extilum
- DNS Management - Client Area
- Show all articles ( 1 ) Collapse Articles
-
-
- Manage Privileges for MySQL Database – Client Area
- Manage MySQL Database User - Client Area
- Manage MySQL Databases - Client Area
- Manage FTP Accounts - Client Area
- Create FTP Accounts - Client Area
- Domain Redirect - Client Area
- Domain Aliases - Client Area
- Manage DNS Records with Zone editor - Client Area
- Disk Usage - Client Area
- Manage Backups - Client Area
- File Manager - Client Area
- Use IP Blocker - Client Area
- Change PHP Version - Client Area
- Manage Subdomains - Client Area
- Unban IP Address - Client Area
- Create an Addon domain - Client Area
- Show all articles ( 1 ) Collapse Articles
-
cPanel
-
- Login to cPanel
- Login to cPanel from Extilum Client Area
- The Jupiter Theme Interface - cPanel
- Switch to Paper Lantern - cPanel
- Search - cPanel
- View Server Information for cPanel
- View Statistics - cPanel
- Change Style - cPanel
- Change Language -cPanel
- Change Password - cPanel
- Update Contact Information and Preferences - cPanel
- Add User - User Manager - cPanel
- Edit User in User Manager - cPanel
- Change Password - User Manager - cPanel
- Delete User in User Manager – cPanel
- Log out of cPanel
- Show all articles ( 1 ) Collapse Articles
-
-
-
- Accessing File Manager - cPanel
- File Manager Settings - cPanel
- Create a New File or Folder in File Manager - cPanel
- Rename a file or folder in File Manager - cPanel
- Change Permissions File Manager - cPanel
- Password Protect Directory File Manager - cPanel
- Enable Leech Protection File Manager - cPanel
- Manage indices File Manager - cPanel
- Upload and download files using File Manager - cPanel
- Compress Files using File Manager - cPanel
- Extract Files using File Manager – cPanel
- Delete and Restore in File Manager - cPanel
- Search in File Manager - cPanel
- Copy Files in File Manager - cPanel
- Move Files in File Manager - cPanel
- Edit a File Using File Manager - cPanel
- HTML Editor in File Manager - cPanel
- Show all articles ( 2 ) Collapse Articles
-
- Articles coming soon
-
-
-
-
- MySQL Databases Interface - cPanel
- Add New User to MySQL Databases - cPanel
- Change a MySQL Database User's Password - cPanel
- Rename a MySQL Database User - cPanel
- Create a MySQL Database - cPanel
- Add User to MySQL Database - cPanel
- Check and Repair MySQL Database - cPanel
- Revoke User Privileges from MySQL Database - cPanel
- Delete MySQL Database - cPanel
- Delete MySQL Database User - cPanel
- Manage MySQL Databases - cPanel
-
-
- Install WordPress using Softaculous - cPanel
- Automatically Update WordPress with Softaculous - cPanel
- Backup WordPress using Softaculous - cPanel
- Manage Backup Location Softaculous - cPanel
- Manage WordPress Automated Backups Softaculous - cPanel
- Restore WordPress Backup using Softaculous - cPanel
- Clone WordPress using Softaculous - cPanel
- Stage WordPress Website with Softaculous - cPanel
- Push WordPress From Staging to Live with Softaculous - cPanel
- Remove WordPress using Softaculous - cPanel
-
-
WordPress
-
- Install WordPress using Softaculous - cPanel
- Automatically Update WordPress with Softaculous - cPanel
- Backup WordPress using Softaculous - cPanel
- Manage Backup Location Softaculous - cPanel
- Manage WordPress Automated Backups Softaculous - cPanel
- Restore WordPress Backup using Softaculous - cPanel
- Clone WordPress using Softaculous - cPanel
- Stage WordPress Website with Softaculous - cPanel
- Push WordPress From Staging to Live with Softaculous - cPanel
- Remove WordPress using Softaculous - cPanel
-
- Install WordPress Using the WordPress Toolkit - cPanel
- WordPress Toolkit Updates and Security Status Check - Cpanel
- Manage Updates using WordPress Toolkit - cPanel
- Check WordPress Integrity with the WordPress Toolkit - cPanel
- Manage maintenance mode in the WordPress Toolkit - cPanel
- Stage WordPress with the WordPress Toolkit - cPanel
- Manage Plugins using the WordPress Toolkit - cPanel
- Manage Themes using the WordPress Toolkit - cPanel
- Manage WordPress multiple sites with WordPress Toolkit
- WordPress plugins for multiple sites - WordPress Toolkit
- WordPress Themes for multiple sites – WordPress Toolkit
- Delete or Detach WordPress site – WordPress Toolkit
- Add Existing WordPress Installations to WordPress Toolkit
- WordPress Toolkit Tools - cPanel
- Back up and Restore WordPress - WordPress Toolkit
-
-
Webmail
Import Email Addresses into cPanel
0 out of 5 stars
| 5 Stars | 0% | |
| 4 Stars | 0% | |
| 3 Stars | 0% | |
| 2 Stars | 0% | |
| 1 Stars | 0% |
Learn How to Import Email Addresses into cPanel using Address Importer. You can use two types of files to create multiple forwarders for your account simultaneously. You may use spreadsheet files (.xls) or comma-separated values sheet files (.csv) to import data. It is a very useful feature when you have a lot of emails to create.
Video tutorial – Import Email Addresses into cPanel
Step-by-step tutorial – Import Email Addresses into cPanel
- Login to cPanel.
Tutorial: login from the Client Area or the direct link.
Find the Email section and click the Address Importer link.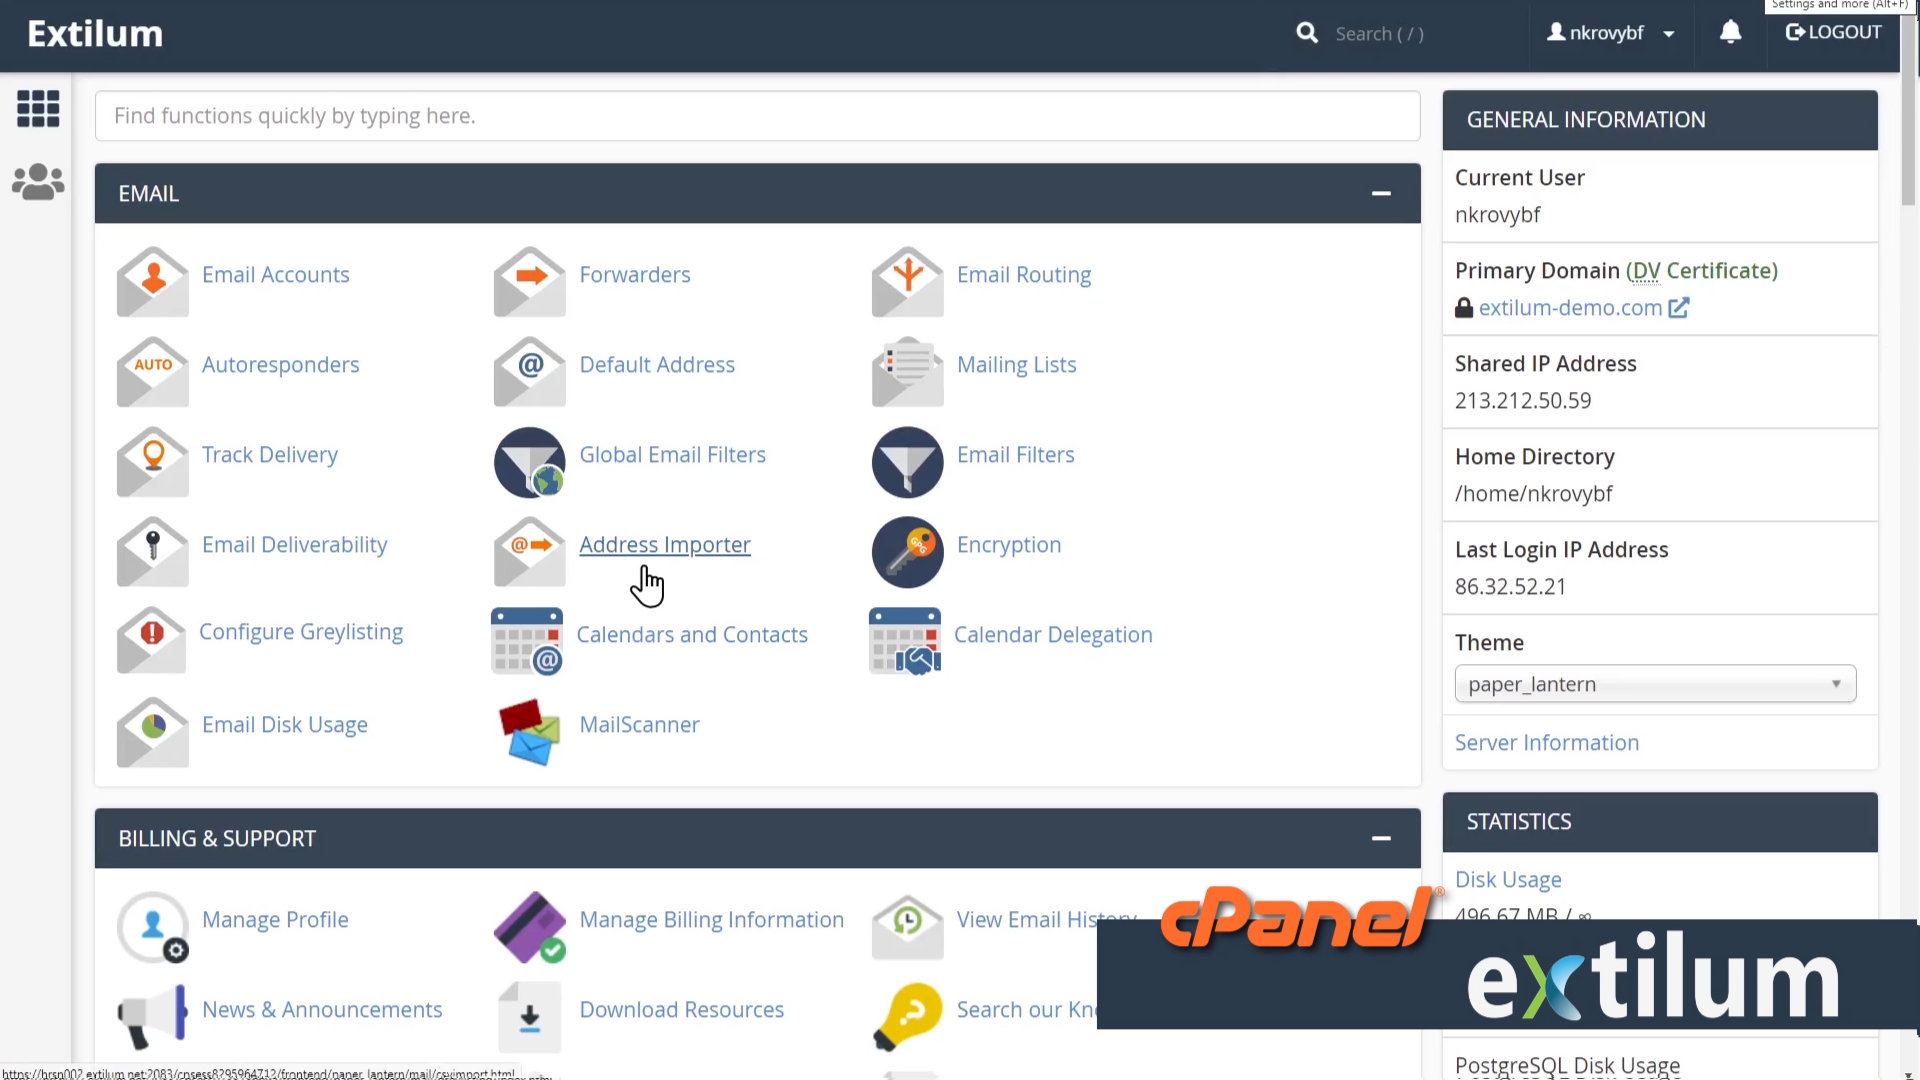
- Address Importer
Step 1
Select What would you like to import.
Select the Email Accounts option.
Step 2
Locate CSV or XLS files on your computer.
Click the Choose File button to select the file to import.
Browse and upload your Excel Spreadsheet or CSV file.
Step 3
XLS file
– Select treat the first row as the column header if you placed column headers in the first row of the file.
CSV file
Select Delimiter
– Select the character that you used as the delimiter.
If you used a delimiter that does not appear in the list, select Other and enter that character in the Other text box.
– Select treat the first row as the column header if you placed column headers in the first row of the file.
Click the Next button.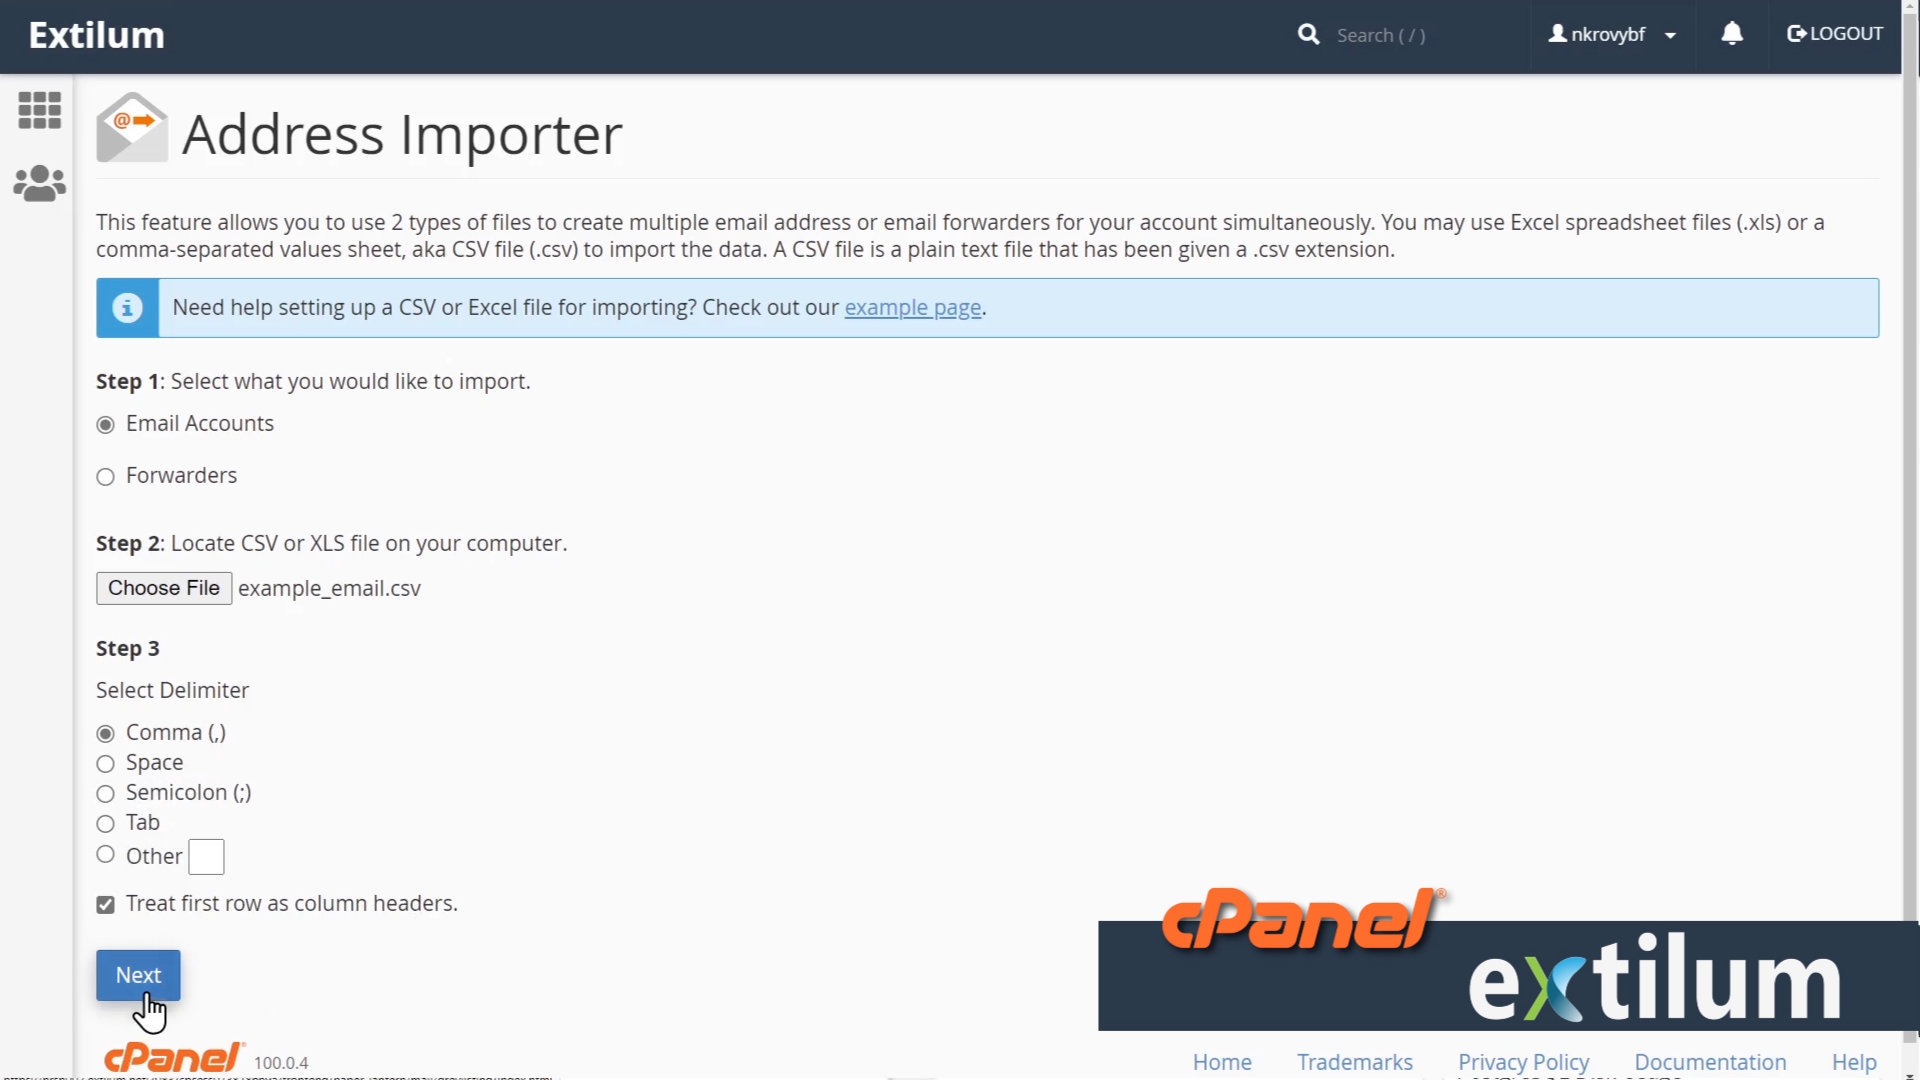
- Import E-mail Accounts
Step 1
Choose the header from the dropdown in the table that corresponds to each column.
Use the menus above each column of values to assign the properties of each delimited value.
– For example, if you chose to use a comma as the delimiter, and input the line account, password, domain, use the menus above each value to assign the account to Email, password to Password, and domain to Domain.
– Select Ignore for columns that contain unnecessary data.
Step 2
Domain
Choose the domain to use for these accounts.
Click the Next button.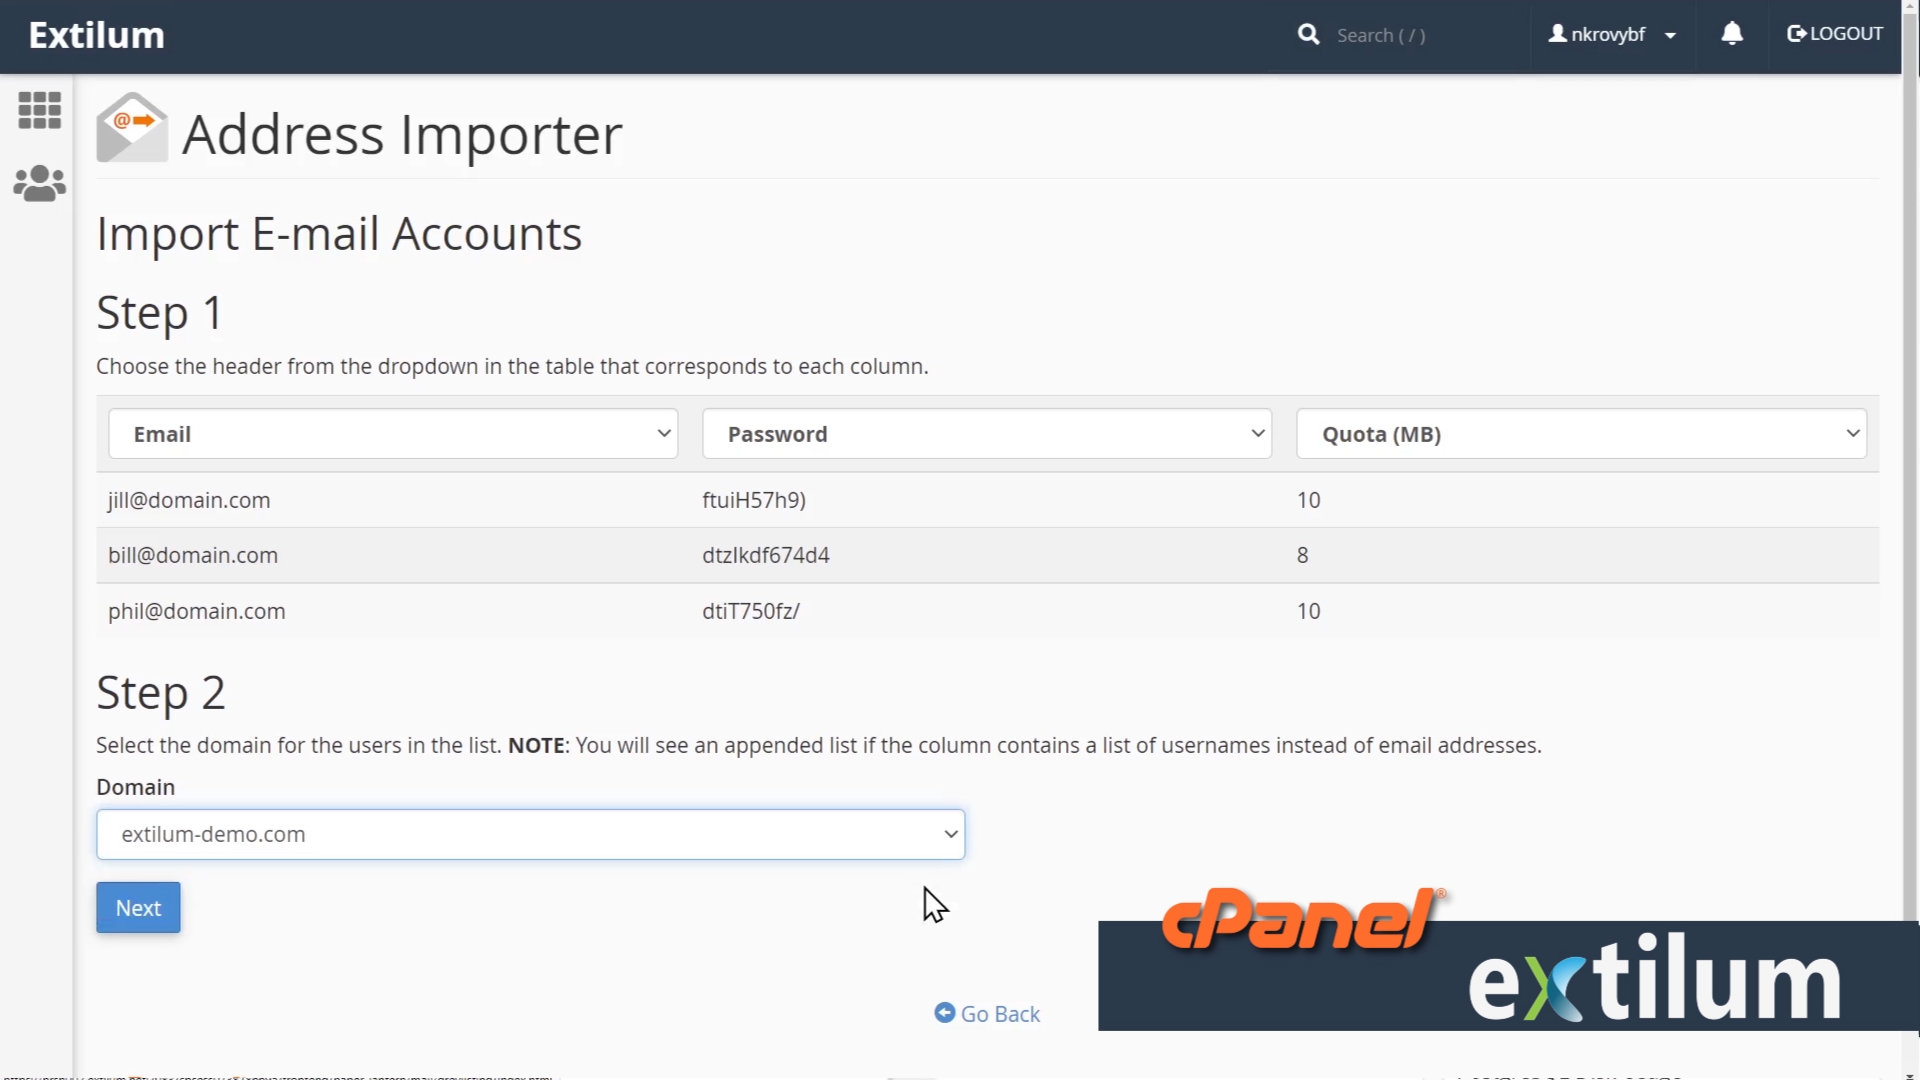
- Review the settings
Click the Finish button.
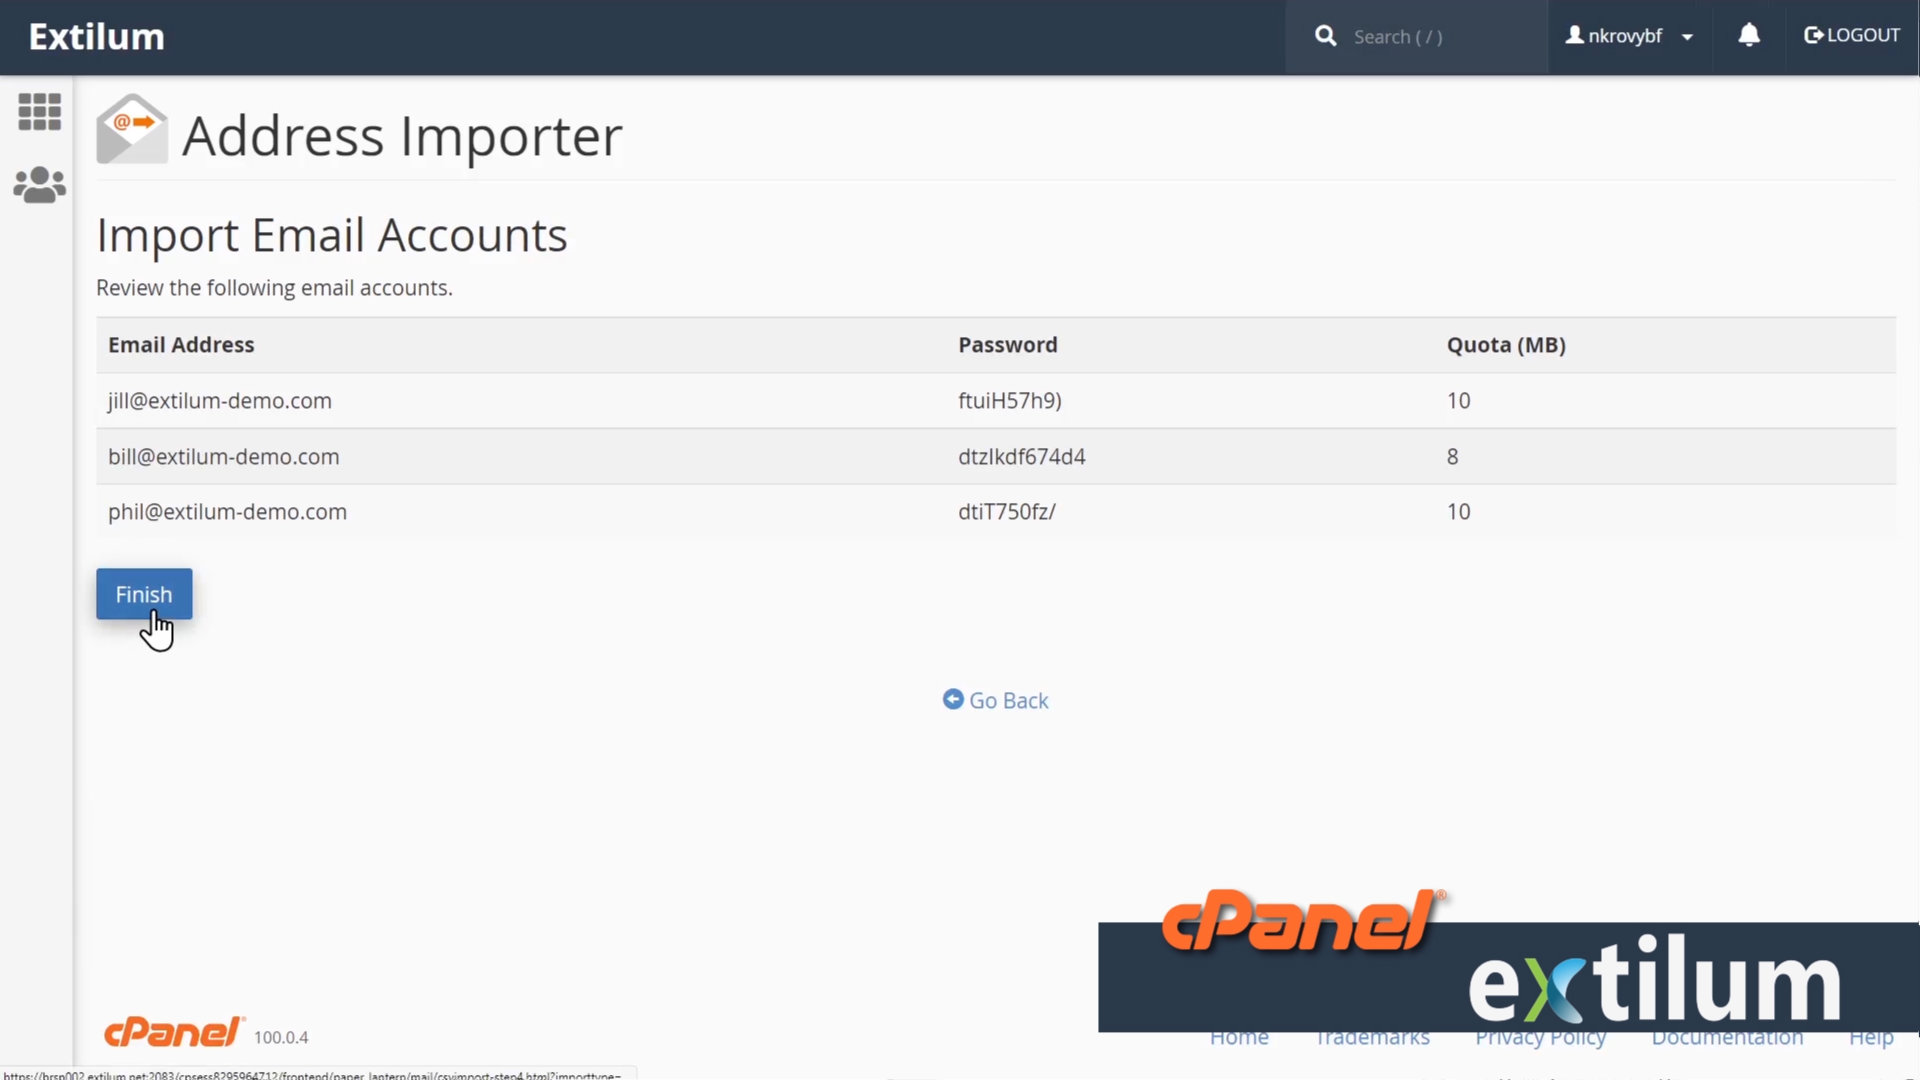
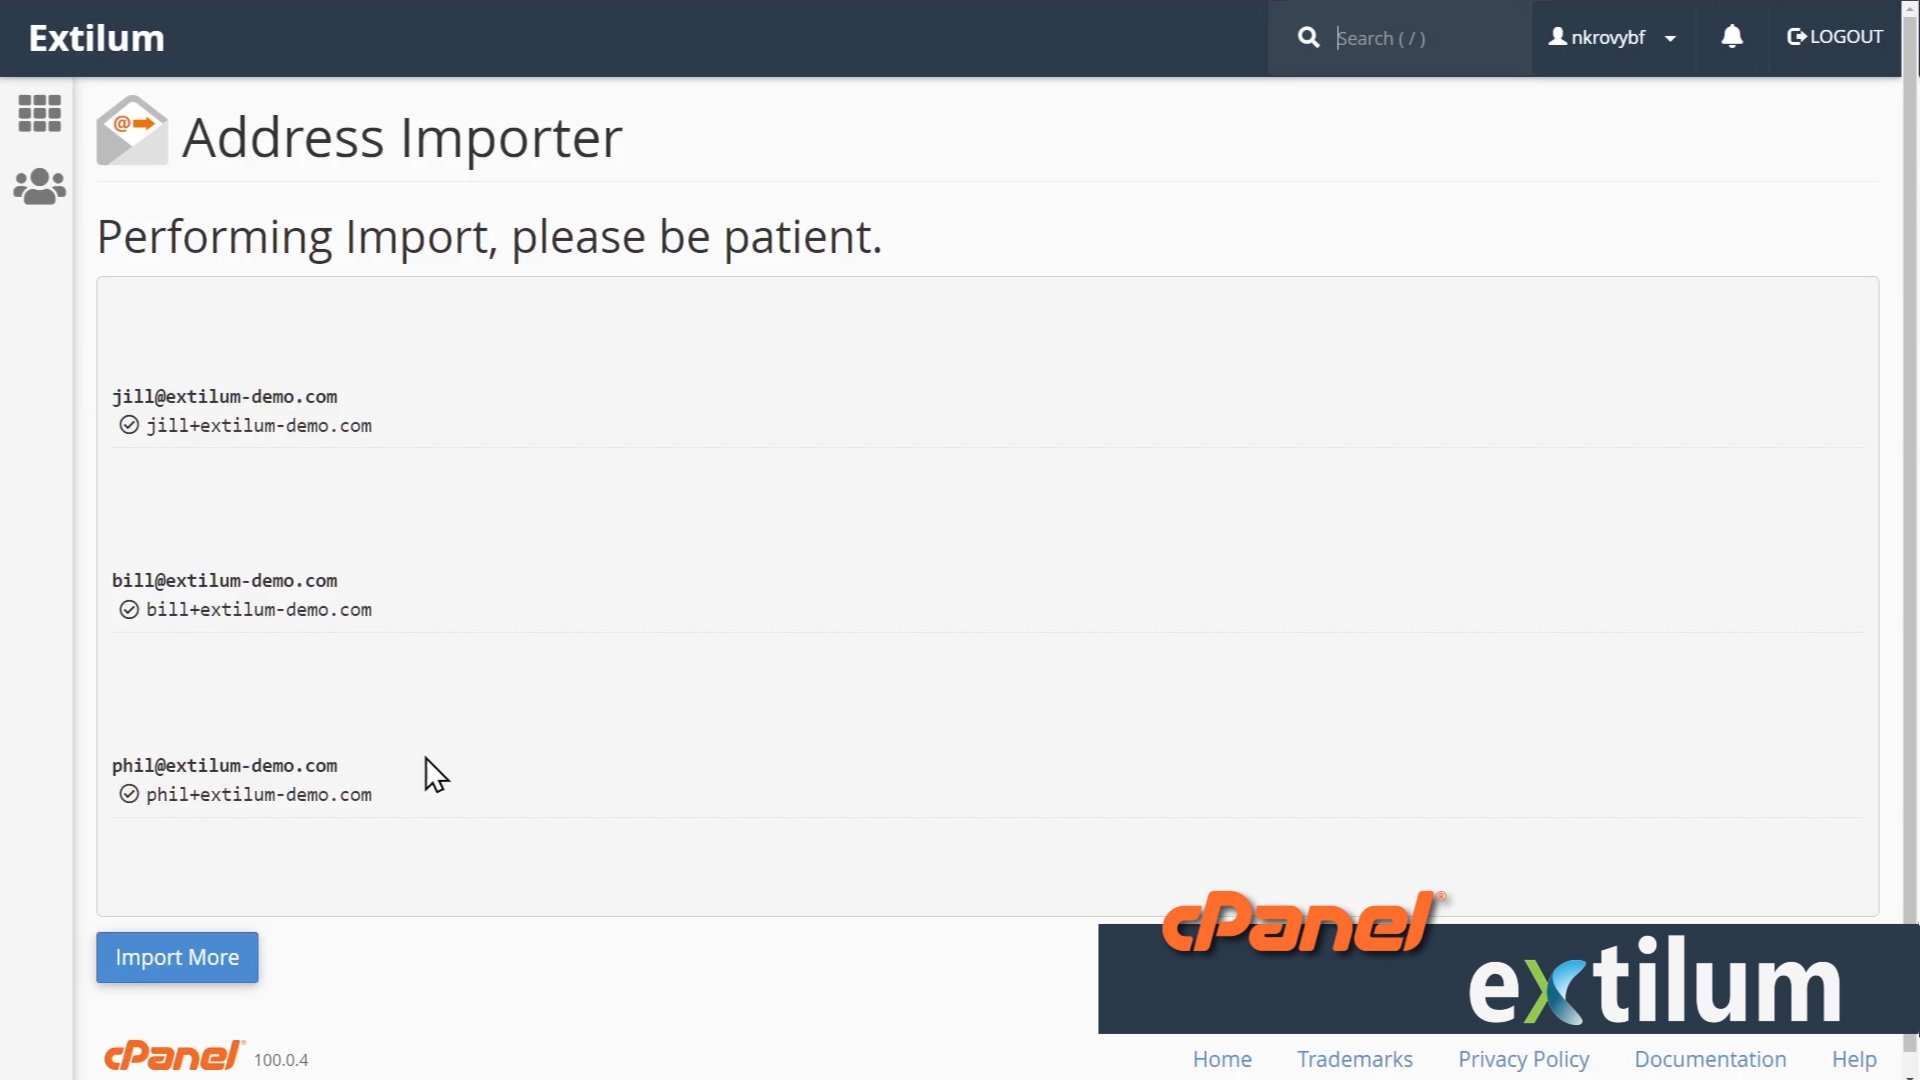
- Wait for the Process to finish
Click the Import More to return to the first screen of this interface and import additional addresses.
Related Article
0 out of 5 stars
| 5 Stars | 0% | |
| 4 Stars | 0% | |
| 3 Stars | 0% | |
| 2 Stars | 0% | |
| 1 Stars | 0% |